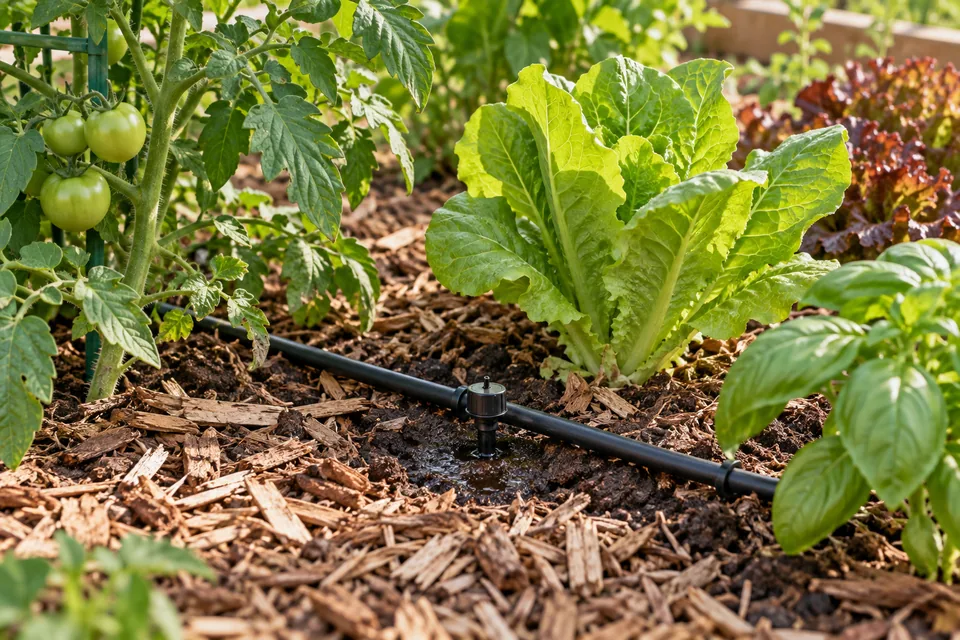
September can mean first frost in a northern valley, peak harvest in a temperate garden, or the start of cool-season planting in a hot region. Match these tasks to your weather and crop stage. USDA hardiness zones describe average annual extreme winter lows; they do not supply planting dates or a dependable first-frost deadline. For the whole autumn in one list, ordered by frost and soil temperature rather than by month, see the fall garden checklist.
September tasks
Monitor weather closely; watch frost forecasts
Where frost is approaching, prepare before a warning appears:
- Check local forecasts for overnight lows; treat longer-range outlooks as preparation signals
- Look up your local frost-date distribution and check how its probability is defined; an average is not a guarantee
- Watch for clear, calm nights — these bring frost risk even when temperatures look borderline
- Have frost protection ready (row covers, blankets, or plan for early harvest)
Keep a minimum thermometer near crop height in the most exposed bed. Low areas, containers, and sheltered walls can differ from the weather station. Record which bed frosts first so you can place sensitive crops more deliberately next year.
Harvest fall crops at peak quality
September vegetables often taste better than spring/summer because of cool nights and moderate temperatures:
- Lettuce and other greens: Harvest outer leaves or cut-and-come-again style; greens are tender and mild in cool weather
- Brassicas (broccoli, cabbage, kale): Taste sweetest after a light frost (cold triggers starch → sugar conversion)
- Root crops (carrots, beets, turnips): Sweeter in cool fall weather; harvest as they reach full size
- Radishes: Crisp and mild in cool weather
- Spinach: Harvest usable leaves; established plants tolerate frost, though variety and acclimation affect survival
Harvest for usable size and quality; do not leave a ready crop unpicked merely to expose it to frost.
Cool conditions can increase sugar concentration in some hardy crops, including carrots and kale. That response does not make every vegetable freeze-proof: lettuce leaves, cauliflower heads, and exposed beet shoulders can still suffer damage.
Continue supporting fall crops
Keep established fall crops growing while light and temperature permit:
- Check soil moisture below the surface; cool air does not guarantee moist roots
- Mulch established crops while keeping seed rows and small seedlings clear
- Weed before weeds set seed — September is when many weeds make their final push
- Inspect leaf undersides for caterpillars and aphids; autumn populations can remain damaging
Begin removing failing summer crops
Where summer crops are declining:
- Remove severely diseased plants — tomatoes with late blight, peppers with leaf spot
- Assess remaining fruit against the weather; keep healthy plants when enough warmth remains to ripen a useful harvest
- Keep productive, healthy plants and remove fallen fruit that attracts pests
- Compost disease-free foliage and stems; discard diseased material
Prepare harvesting and preservation workflow
Prepare for periods when several crops are ready together:
- Organize preservation methods: freezing, canning, drying, fresh storage
- Ensure you have supplies: freezer containers, canning jars, drying racks
- Plan harvesting schedule: pick during cool conditions and move produce promptly to shade
- Set up washing and storage areas for efficiency
Match each harvest to available refrigerator, freezer, and storage space before picking more than you can handle.
Plan for season end
Before cold weather limits outdoor work:
- Calculate planting windows — know which crops still have time to mature
- Plan cover crops — when summer crops finish, what will protect and build the soil?
- Note successes and failures — tomato varieties that did well, pests that were problematic
- Review soil amendments — will you add compost, cover-crop aftermath, or mulch this fall?
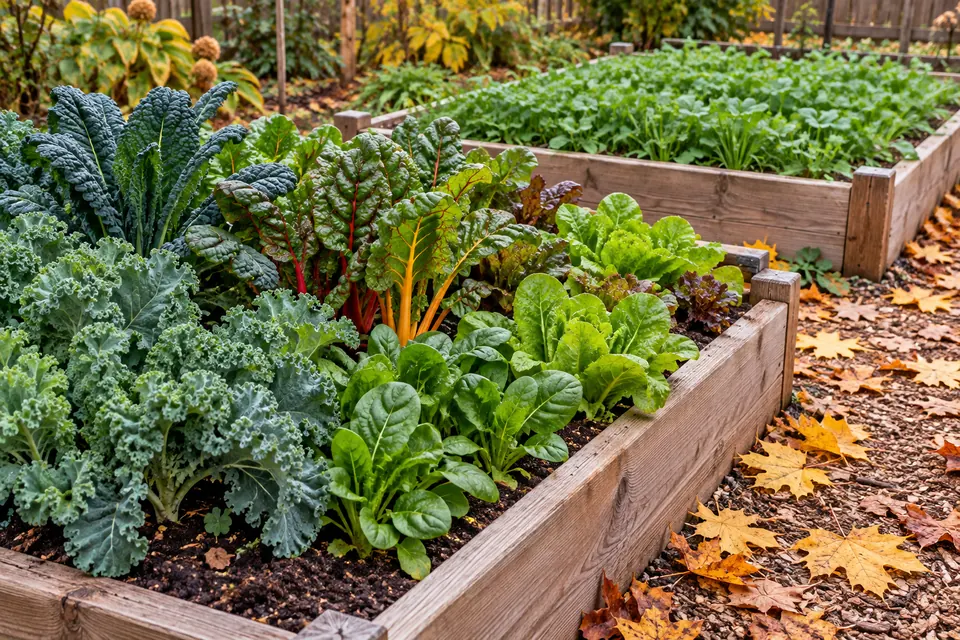
Fall crop management
Brassicas (broccoli, cabbage, kale) at maturity
Judge readiness by the crop, not its planting month:
- Broccoli: Harvest the central head when it's tight and green (before flowers open). Some varieties produce harvestable side shoots afterward.
- Cabbage: Harvest when solid and firm; cut with a sharp knife; small secondary heads may form if healthy leaves remain and the season is long enough
- Kale: Harvest outer leaves first, working inward; leave the growing point intact; replacement growth slows as days shorten
- Cauliflower: Harvest a compact head at the variety's expected color, before curds separate; purple and orange cultivars are not meant to turn white
Protect marketable broccoli and cauliflower heads when freezing weather threatens; tolerance differs among crops and stages.
Root crops (carrots, beets, turnips) approaching maturity
Pull a sample root before committing to a whole-row harvest:
- Carrots: Check the variety’s expected size and sample a root for texture; diameter varies widely
- Beets: Harvest when 1.5–3 inches in diameter; large beets become woody
- Turnips: Pick when 2–3 inches in diameter; larger roots become pithy
- Radishes: Harvest when crisp; larger radishes become hollow and bitter
Roots can remain in well-drained soil while quality holds and the ground is workable. Harvest sooner where flooding, rodents, splitting, or deep freezing threatens them.
Greens (lettuce, spinach, arugula) at peak
Use leaf size and available regrowth time to choose the harvest method:
- Harvest outer leaves and let the plant continue; this extends harvest period
- Or harvest entire plants when mature; baby-leaf and full-head harvest dates differ
- Check later sowings for usable leaves; catalog maturity estimates often lengthen as autumn light and temperatures decline
- Leave sufficient leaf area if you expect another picking; a heavily stripped plant recovers slowly in autumn
Remove slimy or damaged leaves at harvest and refrigerate sound greens promptly.
Perennial and semi-perennial crops
Some crops planted earlier continue producing:
- Herbs (thyme, rosemary, oregano, sage): Continue harvesting before winter dormancy
- Asparagus: Leave green ferns standing. The usual spring harvest ends by early summer so foliage can replenish the crowns; September is not an asparagus harvest window
- Artichokes: Harvest firm, unopened buds when they reach the variety’s usable size; season and winter survival depend on climate
Harvesting fall vegetables
Optimal harvest quality
Protect harvest quality from the moment produce is picked:
- Morning harvest after dew dries is ideal quality
- Cool quickly after harvest to preserve crispness
- Harvest regularly to prevent overmature vegetables
- Shade produce during hot-weather harvests and move it promptly to the appropriate storage conditions
Storage potential
Many fall crops store better than summer crops:
- Carrots and beets: Store cold and humid, ideally near 32–40°F without freezing. Trim tops; a warm basement is not equivalent to a root cellar
- Cabbage: Store sound, firm heads cold and humid; storage cultivars keep longer than early types
- Hard squash (if growing): Harvest before frost; stores well in cool, dry place
- Greens: Refrigerate for short-term use; blanch and freeze suitable cooking greens for longer storage
- Kale: Plants with healthy crowns and remaining leaves can supply later pickings when conditions allow
Preservation methods for fall harvest
- Freezing: Follow crop-specific preparation and blanching times; these vary by vegetable and cut size
- Cold storage: Measure temperature and humidity; separate crops with different requirements
- Canning: Use a tested recipe with the specified acidity, processing method, time, and altitude adjustment
- Drying: Herbs dry beautifully in fall; some vegetables can be dried
Curing and storing winter crops
Curing heals minor harvest wounds or dries protective skins. It cannot rescue rot, deep cuts, frost damage, or immature produce. Sort crops into three groups as you harvest: sound produce for storage, damaged but sound produce for prompt use, and decayed produce for disposal. Label crates by crop, variety, and harvest date.
Match curing to the crop
Winter squash and pumpkins: Cut mature fruit from the vine with a short stem attached, and support the fruit from underneath. Cure suitable types in warm, ventilated conditions around 80–85°F for roughly 10–14 days, then move them to 50–55°F storage. Do not heat-cure acorn squash: it loses quality and storage life under those conditions. Use acorn types before longer-keeping squash, and separate all squash from ripening apples and pears. Iowa State’s squash storage guide explains the exception.
Onions and garlic: Dry mature bulbs with tops attached under cover and with good airflow. Wait until wrappers are papery and onion necks are dry before trimming. Store cured bulbs in breathable containers, away from the humid conditions used for carrots. Keep thick-necked, damaged, or poorly cured onions out of the long-storage batch.
Potatoes: Cure sound, unwashed tubers in darkness at approximately 50–60°F with high humidity and ventilation for about two weeks, then move them to cool, dark storage. Do not seal damp potatoes in plastic. Exclude rotting, badly damaged, or extensively green tubers; greening signals conditions associated with increased glycoalkaloids. See Minnesota’s potato greening guidance.
Sweet potatoes: Handle skins gently and begin curing promptly. Commercial curing uses about 85°F, 85–90% relative humidity, and ventilation for several days; cooler home conditions take longer. Do not improvise a sealed, wet container to raise humidity. Store cured roots around 55–60°F, avoiding refrigeration. NC State’s postharvest guidance explains how temperature and ventilation affect curing.
Set up storage before harvest day
- Measure the space. Leave a thermometer where the produce will sit, including near the floor. An attached garage may be warm in September and freeze in January.
- Divide the storage conditions. Carrots, beets, and cabbage need cold, humid storage; cured onions need drier air; squash and sweet potatoes need warmer conditions. One shelf rarely suits everything.
- Use shallow, inspectable containers. Keep labels visible and leave room for air movement. Avoid tightly packing questionable specimens among sound ones.
- Check weekly at first. Remove soft or leaking produce promptly. Investigate condensation, shrinking, or sprouting rather than accepting repeated losses.
- Use the shortest-lived crop first. Shelf-life estimates assume appropriate conditions and sound produce; they are not expiry guarantees.
For small harvests of carrots, beets, and other cold-storage crops, refrigerator storage in perforated bags is often more controllable than a basement bin. Keep roots cold without allowing them to freeze or sit in standing water. Minnesota’s home storage guide separates crops by temperature and humidity needs.
Frost monitoring
Act before tender crops freeze
Do not wait for a forecast of 28°F. Tender leaves and fruit can suffer at a light frost, and exposed foliage may cool below the official air temperature on a clear, calm night. Pick usable basil, peppers, eggplant, beans, and tomatoes before a likely damaging event.
Prepare covers in daylight: set hoops, check for holes, and make sure the material reaches the ground on every side. Secure the edges to retain soil warmth and stop wind lifting them. Move small containers into shelter when that is more reliable than covering them.
Know what a cover can achieve
Frost fabric reduces heat loss; it does not generate heat. Protection varies with fabric weight, soil warmth, wind, cloud cover, installation, and the duration of cold. Do not treat a quoted temperature gain as a guarantee. An extended windy freeze can overwhelm a cover that handled a brief, calm frost.
Use a thermometer under the cover to check actual conditions. Support heavy fabric above delicate leaves, and ventilate covers or tunnels when sun raises temperatures. Clear plastic requires particular attention because it can overheat rapidly; keep it off foliage. Minnesota’s freeze-protection guidance describes why material and application affect results.
Reassess crops the next day
Wait for frozen leaves to thaw before harvesting or handling them. Inspect the growing point, fruit, and exposed root shoulders as well as outer leaves. Water-soaked tissue that becomes limp or dark is damaged; it will not improve in storage.
Established kale and spinach often tolerate more cold than lettuce or developing broccoli heads. Cultivar, plant age, acclimation, and freeze duration matter. Mulch slows soil freezing around root crops but cannot keep the ground unfrozen indefinitely. Harvest a portion for indoor storage before access becomes uncertain.
Summer crop cleanup
Clear a bed with its next use in mind
Remove finished crop tops, fallen fruit, and weeds before mature seed drops. Pull roots when needed to inspect suspected disease or remove perennial weeds; healthy fine roots can remain to decompose. Identify a serious disease before deciding what to replant, since a one-year rotation does not eliminate every soilborne pathogen.
Compost healthy residue. Keep heavily diseased material and seeding weeds out of a casual, cool compost pile. Clean soil from stakes and tools before disinfecting equipment used on affected plants.
A cleared bed needs a destination: another food crop, a cover crop, or mulch. Do not add fertilizer simply because the bed is empty. Base amendments on soil results and the needs of the following crop, and avoid cultivating wet soil.
Decide whether another sowing is realistic
Check a local fall planting calendar, then compare the remaining growing period with the crop’s maturity estimate. Add time for slower autumn growth; a packet’s summer estimate is not a promise for September. A small picking of baby spinach or arugula may be realistic when a full cabbage head is not. In hot regions, wait for suitable germination temperatures or use locally recommended transplants.
Mark the intended harvest stage on the bed label. Thin seedlings promptly, keep the seedbed evenly moist, and check emergence rather than repeatedly sowing into a dry or crusted row. If establishment fails and the window has closed, mulch the bed instead of spending seed on an unlikely harvest.
Check fall crops before covering them
Inspect broccoli and kale for caterpillars, eggs, and aphid colonies before fitting insect mesh or frost fabric. Covering an infested bed can keep pests inside. Remove visible caterpillars and heavily infested leaves, then recheck new growth. Look under mulch for slugs where seedlings disappear overnight. A clean growing point and a stable stand are more useful than a calendar-based spray.
Thin crowded roots to their packet spacing while they are small. Uneven, undersized roots can reflect crowding, drought, or insufficient light; extra fertilizer cannot correct those causes. Keep a short note of the sowing date, spacing, and first harvest to improve next year’s fall schedule.
Protect bare soil
Choose a locally suitable cover crop only if it has time to establish and you can remove it before spring planting. Oats that winterkill can be useful in cold regions; cereal rye is hardier but needs a deliberate spring termination plan. Where the window has passed, spread clean plant-based mulch rather than leaving soil exposed. New Hampshire’s cover-crop guide explains the tradeoffs; its dates are regional.
Sources and further reading
- University of Minnesota Extension: Harvesting and storing home garden vegetables
- Iowa State University Extension: Harvesting, curing, and storing winter squash
- NC State Extension: Postharvest handling of sweetpotatoes
- University of Minnesota Extension: Growing asparagus
- University of New Hampshire Extension: Cover cropping for the home garden
- National Center for Home Food Preservation: Preserving winter greens