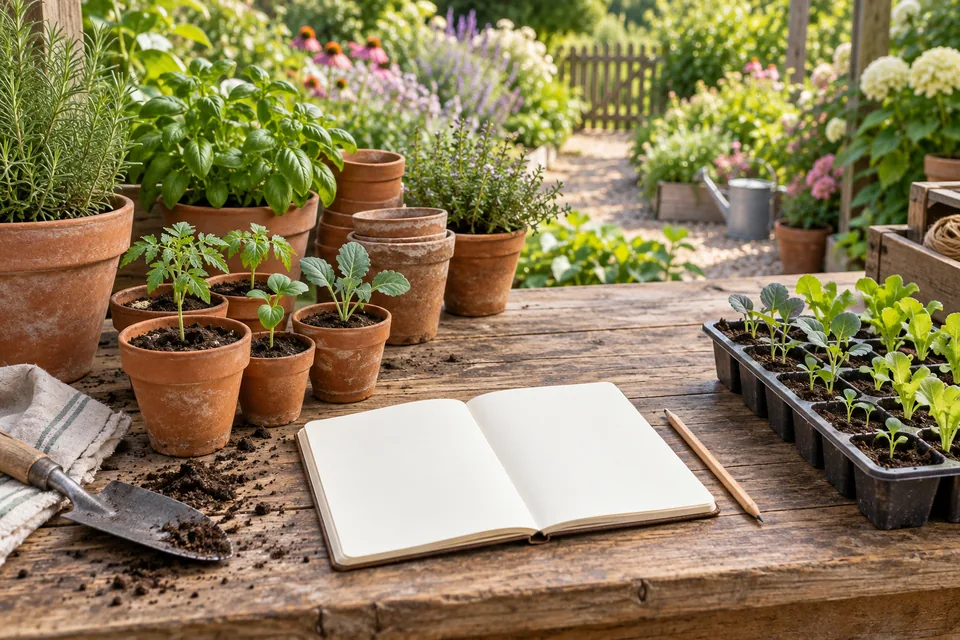
February sowing depends on when plants can actually go outdoors. In a cold climate, tomatoes may still be weeks away from their indoor start; in a mild climate, cool-season transplants may already be ready for the garden. USDA hardiness zones describe winter extremes and cannot supply a seed-starting date. Use this guide with a local planting calendar and the instructions for each crop; the seed starting calculator turns your last frost date into sowing dates.
February tasks
Start warm-season seeds indoors
Choose a realistic transplant window, then count backward by the packet’s recommended indoor growing period. Check whether that period already includes germination; adding it twice produces oversized plants. Common starting ranges are:
- Tomatoes: Often 6–8 weeks before transplanting
- Peppers and eggplant: Often 8–10 weeks; some pepper varieties take longer
- Basil and other herbs: Start 4–6 weeks before transplanting
- Squash, cucumbers, melons: Start 3–4 weeks before transplanting (they grow fast)
How to start seeds indoors:
- Use seed-starting mix (a fresh, fine-textured soilless mix intended for germination)
- Moisten the mix thoroughly before filling pots or trays
- Sow seeds at depth indicated on the packet (usually 1–2 times the seed diameter)
- Set lights at the fixture manufacturer’s seedling height and put them on a timer
- Keep soil moist but not waterlogged
- Maintain the germination temperature specified for the crop, measured in the mix
- Provide gentle air circulation without blowing trays dry
Use about 14–16 hours of light per day, followed by darkness. Rotate trays if seedlings lean toward one side; rotation does not compensate for inadequate light.
Measure bottom heat. A thermostatically controlled seedling mat can help peppers and eggplant germinate in a cool room. Put the probe in the mix according to its instructions; the air temperature and root-zone temperature may differ. Check the crop’s preferred range instead of using the same setting for every tray. Once seedlings emerge, reassess the need for heat: unnecessary warmth with weak light encourages elongated growth.
Separate crops with different requirements. Sow lettuce and peppers in separate pots or removable cell packs. Then one crop can leave the humidity cover and heat mat without waiting for a slower neighbor. Label every container with cultivar and date; a tray diagram alone is easily lost when pots move.
Potting up as seedlings grow
Tomatoes and peppers started in small cells often need larger pots before outdoor planting. Check for roots filling the cell and increasingly frequent drying; investigate slow growth before assuming pot size is the cause.
- Move up one size, not several: a seedling from a 2-inch cell goes to a 4-inch pot, not straight to a gallon container — too much soil volume around small roots holds excess moisture and invites rot
- Bury tomato stems deeper when potting up; tomatoes root readily along a buried stem, and a deeper set produces a stronger root system by transplant time
- Water thoroughly after potting up and keep out of direct strong light for a day while roots settle into the new soil
Continue hardening off early transplants
Begin acclimating cool-season seedlings when they have enough roots to hold the plug together and outdoor planting is approaching:
- Begin with 1 hour outdoors in a protected, shaded spot
- Increase exposure by 1–2 hours daily over 7–14 days
- Aim for 10–12 hours of outdoor time by day before transplanting
- Bring plants in if temperatures drop below frost tolerance for your crops
- Move transplants to a sheltered spot that receives morning sun and afternoon shade
Hardening off is not a quick process. Rushing leads to sunburned, wilted transplants that stall in the garden.
Begin spring cleanup
Work from paths while beds are wet. Clear blocked drains, repair supports, and remove volunteer weeds before they set seed. In vegetable beds, dispose of known diseased crop remains according to the disease’s guidance; do not leave infected material simply because it cannot go in a cool compost pile.
Leave sound leaf litter and standing stems in ornamental areas where they do not smother crowns or obstruct access. Overwintering insects use this material. Expose only the sowing strips that need warming, and keep mulch available if a hard freeze returns. A tidy-looking bed is not a reason to disturb saturated soil.
Monitor soil temperature
Check soil temperature in your beds daily or every few days. Even if air temperature is warm, soil in February is often still cold. Don't rush planting based on warm air — soil temperature is what matters.
Starting seeds indoors
For the full process in one place, from timing to hardening off, see how to start seeds indoors.
Choose and test the growing medium
A fresh commercial seed-starting mix is the simplest option. Check whether it already contains fertilizer and whether it is suitable for fine seed. Garden soil and unfinished compost can compact in small cells and introduce weeds or pathogens. No mix guarantees freedom from damping off once tools, water, or containers reintroduce contamination.
Premoisten a small batch first. It should hold together lightly when squeezed and fall apart when disturbed, without dripping water. Fill a test cell, water it, and confirm that excess water drains rather than pooling. Very fine mix, blocked holes, and densely packed cells all reduce aeration.
Container options
- Fiber pots: Useful for plants sensitive to root disturbance; remove exposed rims and open the base at transplanting so water can enter and roots can escape
- Cellular trays with cell packs: Reusable, durable, good drainage
- Paper pots: Inexpensive, but inspect frequently because they can dry unevenly or soften before planting
- Yogurt cups with drainage holes: Free, larger volume for crops like squash
Regardless of container, ensure drainage holes are present.
Light requirements
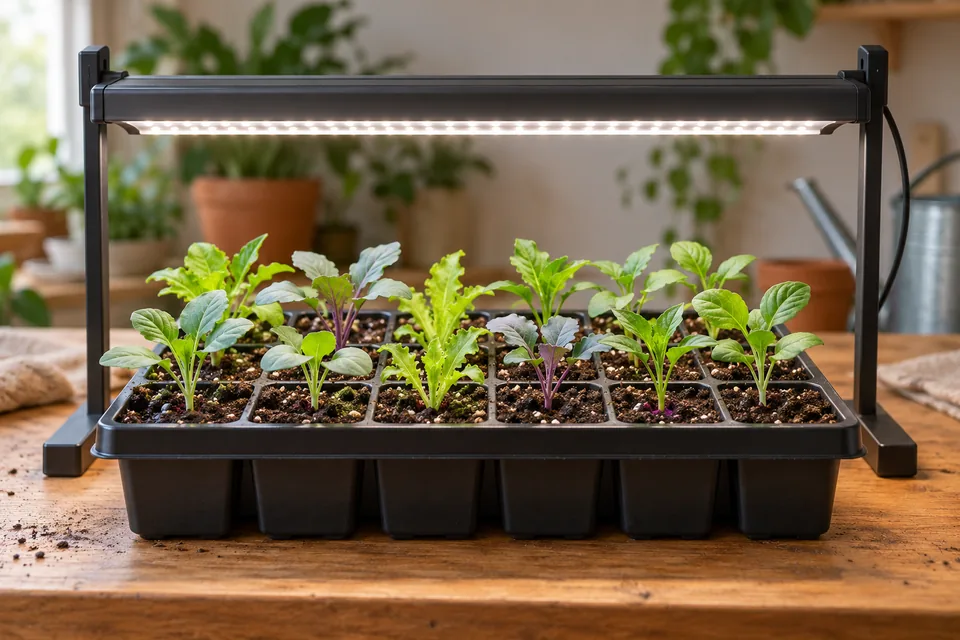
Use a timer for about 14–16 hours of light daily, followed by darkness. Fluorescent tubes and modest-output shop lights often need to be close to seedlings; powerful LEDs may need much more clearance. Follow the fixture’s guidance and inspect the plants rather than applying a universal 2-inch rule.
Keep each crop’s canopy at a similar height by placing shorter pots on stable risers. Rotate trays if edge plants lean toward the center of the fixture. A bright window may support a few plants, but weak winter light often produces long, pale stems. Adding fertilizer will not correct inadequate light.
Water management
Keep germinating seeds evenly moist through the depth of the cell. After emergence, check both surface moisture and tray weight before watering. A misted surface can conceal a dry root zone, and a dry-looking surface can cover saturated mix.
For bottom watering, add a shallow layer of water to the catch tray, allow moisture to move upward, then empty the remaining water once the mix is moistened. Do not leave cells standing in water all day. Water trays separately if disease is suspected; shared water can move pathogens between plants. Drain and clean catch trays before refilling.
Temperature and humidity
Germination temperature varies by species; warm-season vegetables generally need warmer mix than lettuce. Once sprouted, they prefer slightly cooler temperatures (60–70°F) to grow stocky rather than stretching toward light. Humidity is helpful during germination but reduce it once seedlings emerge to prevent fungal disease — remove any humidity dome or plastic cover as soon as the first sprouts appear, not after the whole tray has germinated.
Fertilizing seedlings
Read the mix label first. An unfertilized mix generally needs a dilute complete fertilizer once seedlings have developed several true leaves; a charged mix may supply nutrients for longer. Use the product’s seedling directions, or a reduced concentration recommended by your Extension guide, and water with plain water between feedings. Keep a note of the product and dilution to avoid accidental double feeding.
Pale leaves do not automatically mean hunger. Check light, drainage, root health, and temperature first. Excess fertilizer can injure roots, leaving plants pale despite abundant nutrients.
Troubleshooting seedling problems
Use symptoms to narrow the cause before resowing or changing care.
- Leggy, pale, stretched seedlings: insufficient light, most commonly from lights kept too far above the seedlings or from relying on a windowsill alone. Check fixture height and output, increase light within the fixture’s recommendations, and avoid excessive heat.
- Seedlings collapsing at the soil line (damping off): a disease caused by several fungi and fungus-like organisms, favored by conditions that keep the root zone excessively wet. There is no cure once it starts — remove and discard affected seedlings immediately to protect the rest. Prevent it next time with fresh mix, disinfected containers, adequate light, and careful watering; bottom watering alone does not prevent it.
- No germination at all: check that soil temperature actually reached the seed's minimum (a cool room can sit well below the crop’s recommended germination range even if it feels comfortable to a person), and check the seed's age and viability.
- Uneven, patchy germination: usually old or marginal seed, or an uneven watering pattern that dried out part of the tray. A germination test (described in the January guide) diagnoses old seed before you rely on a full tray of it.
- Yellowing lower leaves with otherwise normal growth: may reflect low nutrients, wet roots, or aging seed leaves. Examine new growth and roots before feeding; normal loss of the first seed leaves does not require a rescue treatment.
- Purple or reddish leaf undersides, especially on tomatoes and peppers: commonly a response to cold temperatures reducing phosphorus uptake rather than an actual phosphorus deficiency in the mix. Check root-zone temperature and growth before adding phosphorus. Some varieties naturally show purple coloring.
- White, fuzzy mold on the soil surface (not on the seedling itself): saprophytic mold feeding on organic matter in the mix, usually harmless to the plant but a sign conditions are too damp and still. Increase airflow and let the surface dry slightly between waterings.
What to plant in February
Where the soil is thawed and drained: use a local vegetable calendar to select cool-season crops. Peas, spinach, lettuce, and radish are candidates when soil is around 40–50°F. Carrots, beets, and other crops have their own germination ranges; sowing near the minimum means a longer wait and more exposure to decay.
Where winter persists: keep sowing and transplanting plans indoors. An unheated tunnel can protect established hardy plants, but does not make frozen ground ready for seed. Check the temperature at plant height overnight before trusting a frame with seedlings.
Where spring arrives early: continue small successions while there is enough cool weather left to mature them. Harden brassica transplants before planting and protect them from severe cold; their tolerance is greater than a tomato’s, but it is not unlimited.
Check overwintered garlic when growth resumes locally. Snow-covered garlic need not be showing shoots in February. If cloves have heaved out of the soil, reseat them gently after thaw and replace displaced mulch.
Indoor starts to consider this month
Start only crops whose indoor growing period fits the available light space and an achievable transplant date. In many northern gardens that means onions, leeks, and slower flowers before tomatoes or squash. In milder regions, peppers or tomatoes may be due. Use the packet’s instructions for each flower and herb: “annual” does not describe a common sowing schedule.
Starting onions and leeks from seed
Onions and leeks are cool-season crops that benefit from an early start, often 10–12 weeks before outdoor planting. Sow in a flat or cells and provide strong light; gently separate plants when transplanting rather than allowing a dense mat of roots to dry out. Trim excessively long onion tops only if needed to keep them manageable; routine severe clipping is unnecessary.
Choose bulb onions for your latitude. Long-day varieties suit northern summers; short-day varieties suit southern growing systems, with intermediate-day types serving some middle latitudes. A well-grown plant of the wrong type may form a disappointing bulb. Leeks are grown for their elongated stems and do not follow the bulb-onion day-length selection rule. University of Minnesota’s onion guide covers seed, sets, and transplants.
Chitting potatoes (mild and warm climates)
If local potato planting is only a few weeks away, this is the time to "chit" (pre-sprout) certified disease-free seed potatoes: set them in a single layer, eyes up, in a cool, bright location (not direct sun) for 2–4 weeks before planting. This produces short, sturdy green sprouts rather than the long, pale, fragile sprouts potatoes develop in dark storage, and chitted potatoes typically emerge from the ground faster and more evenly than unsprouted ones.
Hardening off transplants
Hardening off is the process of acclimating indoor-grown seedlings to outdoor conditions. It is essential for success and cannot be rushed.
Why hardening off matters
Outdoor sunlight, wind, and temperature swings can exceed what seedlings experienced indoors. Without gradual acclimation, transplants can:
- Wilt severely when exposed to sun and wind
- Experience growth check and may not recover for weeks
- Are vulnerable to sunburning (bleached, papery leaves)
- Die after severe exposure
Hardening-off protocol
Week 1–2 before transplant date:
- Days 1–2: 1 hour outdoors in afternoon shade; bring inside
- Days 3–4: 2–3 hours outdoors in afternoon shade
- Days 5–6: 4–5 hours outdoors, morning sun and afternoon shade
- Days 7–8: 6–8 hours outdoors, morning sun and afternoon shade
- Days 9–10: 8–10 hours outdoors, morning sun and afternoon shade
- Days 11–12: 10–12 hours outdoors, including some direct morning sun
- Days 13–14: Full exposure appropriate to the planting site; leave out overnight only when temperatures suit the crop
Use this as a flexible progression, not a deadline. Increase direct sun as well as time outdoors so plants are ready for the actual planting site. Protect tender crops from chilling as well as frost; bring them inside when nights are too cold for the species.
Use a cold frame carefully
A cold frame can reduce daily carrying, but needs a thermometer and ventilation. Check the minimum overnight temperature before leaving seedlings in it. Open the lid farther as plants acclimate, and move tender trays indoors when the forecast exceeds the frame’s protection. A warm sunny afternoon inside a closed frame tells you little about the temperature before dawn.
Common hardening-off mistakes
- Rushing the process: Don't jump from indoors to full sun in one day
- Forgetting about wind: Wind dries seedlings quickly; protect them
- Following the schedule despite bad weather: Step back to shelter during a cold, windy spell and resume gradual exposure when conditions improve
- Letting them dry out: Hardening-off seedlings still need consistent moisture; check soil moisture daily during the process, since outdoor exposure to sun and wind dries pots faster than the indoor environment they came from
- Hardening off on an overcast forecast, then transplanting into sudden bright sun: match the hardening conditions as closely as possible to actual transplant-day conditions
A practical seedling routine
Check the growing space before filling every tray
Run lights, timers, and any heat mat for a day with a moistened test pot in place. Check the mix temperature at the coolest and warmest positions. Confirm that drainage water cannot reach electrical connections and that shelves can carry wet trays. A dry tray’s weight understates the load once every cell is watered.
Plan for potting up. A shelf that holds dozens of tiny cells may hold far fewer 4-inch pots, and plants at the edge of the light footprint often stretch first. Count the final plants needed, add a modest allowance for losses, and leave room to separate fast-growing seedlings from slow ones. Keep an empty tray available for isolating a problem batch.
Spend five minutes each morning on these checks
- Read the labels and dates. Compare emergence with the packet’s range. Do not discard a slow pepper tray because neighboring tomatoes are already up.
- Check moisture in more than one cell. Edges near a fan often dry first; the center of a catch tray may stay wet. Water only what needs it.
- Look at stems at soil level. A pinched, water-soaked stem needs a different response from a healthy stem leaning toward light.
- Check lights and covers. Raise or reposition the fixture as the canopy changes. Remove condensation covers promptly after emergence where they are keeping foliage wet.
- Record the intervention. A short note—watered, fed, moved off heat—makes a later symptom easier to trace. Photograph a representative tray once a week from the same angle.
Thin early without disturbing the plant you are keeping
Where several seedlings occupy one small cell, retain the strongest suitable plant and snip the others near the mix surface. Pulling intertwined seedlings can disturb the remaining roots. Crops intentionally grown as small clusters, such as some herbs, need their own spacing plan; crowding is not a substitute for deciding the final planting arrangement.
When moving a seedling, support the root ball with a small tool. If you need to steady it from above, handle a leaf rather than squeezing the stem. Prepare the receiving pot first so roots are exposed only briefly. Water gently to settle the mix, label the new pot immediately, and return it to suitable light after it recovers.
Respond to fungus gnats at the source
Small dark flies hovering around trays often indicate fungus gnats. Check nearby houseplants as well as seedlings: repeated movement between wet pots can sustain the problem. Yellow sticky cards help detect and monitor adults, but do not remove larvae already in the mix. Correct persistent saturation and remove algae, spilled mix, and plant debris from the growing area. Let the surface dry modestly between waterings once seedlings are established, while keeping the roots adequately moist. University of Minnesota describes fungus-gnat monitoring and moisture management.
If outdoor planting is delayed
Keep plants in strong light and check roots before choosing a larger pot. Pot up plants that repeatedly wilt because their root-filled cells dry too quickly; do not force a frost-tender crop outdoors simply because it has outgrown its tray. Avoid heavy feeding to compensate for a cold forecast. Maintain gradual acclimation when weather allows, but return plants to shelter during unsuitable nights.
For fast-growing cucumbers or squash, a small later sowing can be useful insurance if the original plants are becoming oversized. Keep the two batches labeled and choose the healthy, manageable plants when conditions permit. The objective is an actively growing transplant with an intact root ball, not the oldest or tallest plant.
Sources and further reading
- University of Minnesota Extension: Starting seeds indoors
- University of Minnesota Extension: Preventing seedling damping off
- University of Minnesota Extension: Growing onions
- University of Minnesota Extension: Houseplant pests, including fungus gnats
- University of Minnesota Extension: Planting the vegetable garden
- University of Maryland Extension: Vegetable garden weather and pest protection