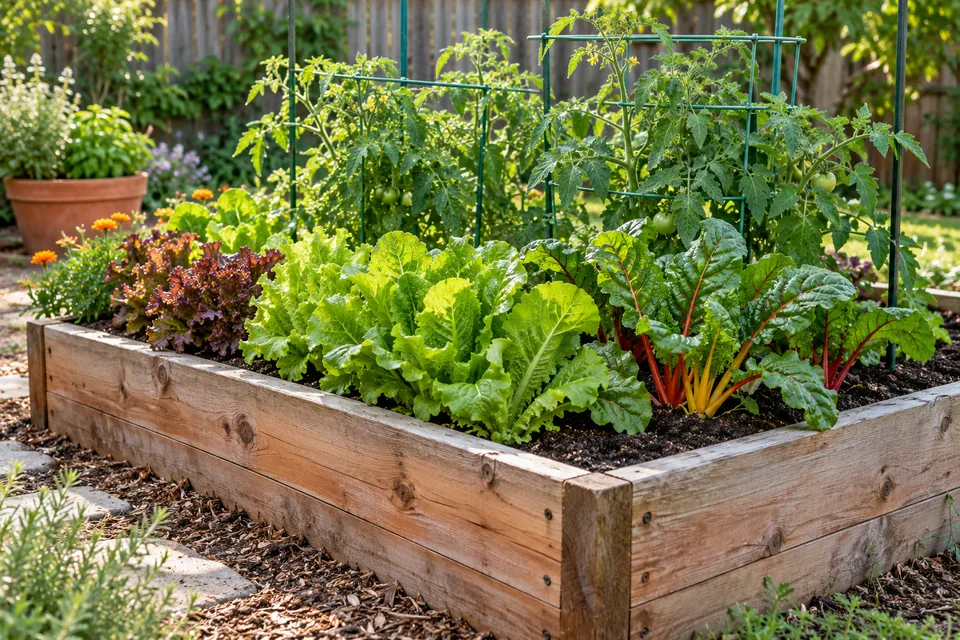
May's workload depends on what the weather has allowed you to plant. A northern garden may still need frost protection; a southern garden may already be harvesting tomatoes. Use soil temperature, overnight forecasts, and the crop's growth stage to choose tasks. USDA hardiness zones describe winter minimum temperatures, not reliable planting dates.
The priorities are to establish new plants without setbacks, keep weeds from seeding, and catch problems while a small intervention can still work. Keep a short record of planting dates, varieties, rainfall, and the first pests you find. It will make next year's timing more accurate than a generic calendar.
May tasks
Check moisture where roots are growing
Move mulch aside and check the soil, rather than judging a dry surface. For established vegetables, feel several inches below the surface; for a new transplant, check its original root ball as well as the surrounding soil. Those two areas can have very different moisture levels.
- Water slowly enough to soak in. If water runs down a path, stop, let it infiltrate, and resume at a lower flow.
- Check the result. After watering, use a trowel beside the plant to see how far moisture penetrated. A wet surface over dry soil is an incomplete watering.
- Adjust to soil and plant size. Sandy beds and small pots dry faster than clay soil; seedlings need moisture close to the surface while established plants need a larger wetted root zone.
- Use morning watering when practical. If plants urgently need water later, water them. Direct water toward the soil and allow wetted foliage time to dry.
About an inch of water per week, including useful rainfall, is a starting point for many established vegetable gardens, not a fixed allowance. Wind, heat, soil texture, and canopy size change demand. A rain gauge measures what reached the garden; a soil check shows whether roots received it.
Keep mulch at a useful depth
Maintain roughly 2–3 inches of loose organic mulch around established plants, keeping it clear of stems and crowns. Check the existing layer before adding more. Deep, compacted mulch can hold too much moisture against plants and obstruct small seedlings.
Let cold soil warm before heavily mulching heat-loving crops. Keep seed rows open until seedlings emerge, then bring mulch closer without burying them. Remove weeds before covering the ground; established perennial weeds can grow through mulch. Use clean material from a known source, particularly where hay, straw, grass clippings, or compost might contain persistent herbicide residues.
Thin seedlings and remove small weeds
Use the seed packet's final spacing, since baby-leaf crops and full-size heads need different room. As rough examples, carrots often finish 2–3 inches apart and beets 3–4 inches apart. Snip crowded seedlings at soil level if pulling them would disturb the roots you want to keep. Thin beet clusters deliberately: one seed cluster can produce several seedlings.
Hoe annual weeds just below the surface on a dry day, or hand-pull when soil is moist enough to release the roots. Work shallowly around vegetables. Repeated deep cultivation brings more weed seed to the surface and damages crop roots. For weeds that keep coming back, see how to wear down perennial weeds. Do not eat unidentified thinnings or seedlings grown from treated seed; edible crop identity alone is not enough.
Check supports before plants become heavy
Install tomato cages, stakes, and climbing supports before roots spread widely. Use soft ties with room for stems to thicken, and revisit them as growth accelerates. Support fruiting branches without forcing them into sharp bends. Secure the base of a trellis as well as its top: wind load increases greatly once it is covered in leaves.
Keep vining crops off paths while the stems are flexible. A runner that has already rooted or wrapped firmly around a support is easier to damage than to redirect. Leave access for harvesting and pest checks; a solid wall of inaccessible foliage becomes difficult to manage later.
Identifying and managing pests
Make scouting a repeatable routine
Inspect the same handful of plants in each bed at least weekly, and more often when seedlings are being damaged. Look at new growth, lower leaves, leaf undersides, and the soil around stems. Record whether damage is old or increasing. A few holes on older leaves may need no action if new leaves are healthy.
Identify both the pest and any predators before choosing a treatment. Lady beetle larvae, lacewing larvae, and hoverfly larvae can be feeding among aphid colonies. Photograph unfamiliar insects and damage, including the whole plant, and use your local Extension diagnostic service if identification remains uncertain. Pest presence alone does not establish a need to spray.
Choose a response by the risk to the crop:
- Aphids on established plants: A directed water stream can dislodge them. Recheck new growth and beneficial insect activity before repeating treatment.
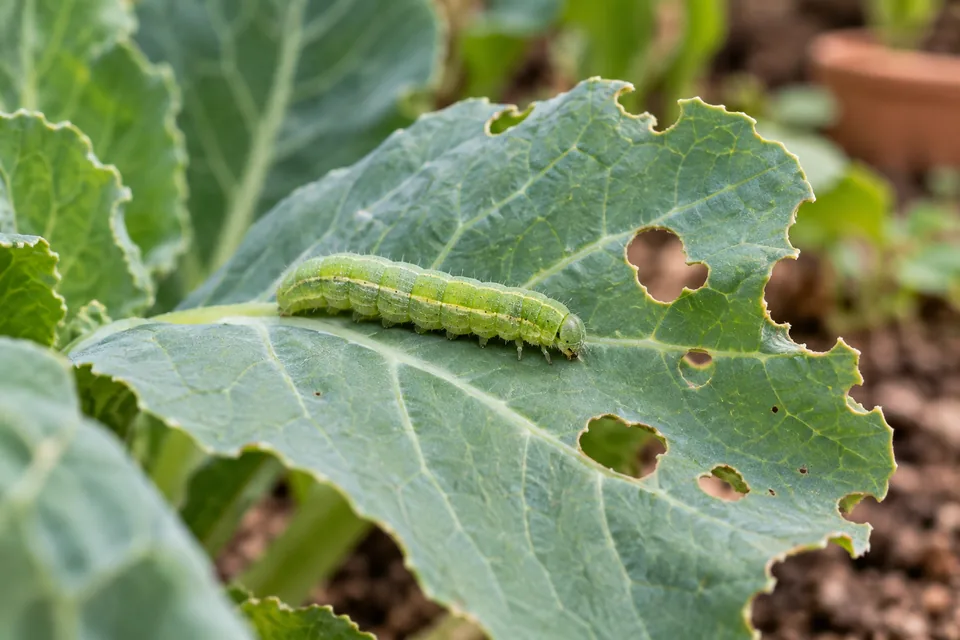
- Caterpillars on leafy crops: Handpick when practical. A labeled Bacillus thuringiensis kurstaki product targets susceptible caterpillars that eat treated foliage; it does not control beetles, squash bugs, or sawfly larvae.
- Seedlings losing substantial leaf area: Act promptly because they have little spare foliage. Identify the culprit, then use an appropriate barrier or targeted control.
- A few pests on vigorous fruiting plants: Compare the rate of new damage with plant growth before intervening.
Match the product to the pest
Insecticidal soap works through direct contact, so wetting an empty leaf will not protect it from insects arriving later. Use a commercial product labeled for the crop and pest, cover the areas where pests are present, and follow its temperature restrictions. Test sensitive plants on a small area first. Household detergents are not interchangeable with formulated insecticidal soap. Clemson Extension explains soap coverage and plant-injury risks.
There is no universal progression from soap to neem to spinosad. Each active ingredient has particular targets, restrictions, and effects on beneficial insects. Check the label's harvest waiting period before treating food crops, and record the treatment date. Avoid spraying drought-stressed foliage or during unsuitable heat, even if damage makes immediate treatment tempting.
Row covers prevent some insects from reaching plants only when installed before infestation and secured at the edges. Check underneath for trapped pests, overheating, and weeds. Remove covers when insect-pollinated crops such as ordinary squash begin flowering; breathable insect mesh can be preferable to heat-retaining fabric in warm weather.
Recognize common vegetable pests
- Squash bugs: Look for bronze egg clusters on leaf undersides and gray nymphs nearby. Remove eggs and young bugs during regular checks; mature bugs are harder to control. Inspect stems too, and distinguish squash bugs from squash vine borers, which tunnel inside stems. UMN's squash bug guide shows the life stages.
- Colorado potato beetles: Striped adults and reddish larvae feed on potatoes and related crops. Check undersides for yellow-orange egg masses. Handpick small infestations; if further control is needed, use current local recommendations rather than assuming an ordinary caterpillar Bt product will work.
- Cucumber beetles: Protect young cucurbits where beetles and bacterial wilt are recurring problems. Covers must permit pollination when flowers open unless the cultivar produces fruit without pollination.
- Tomato hornworms: Follow missing foliage and dark droppings to the caterpillar. Leave individuals carrying white parasitoid cocoons so the beneficial wasps can complete development.
Diagnose leaf spots before treating
Leaf spots, mildew, nutrient problems, and spray injury need different responses. Take a clear photograph and note whether symptoms started on old leaves or new growth, on one plant or the whole bed, and after rain or a treatment. Fungicides do not repair damaged tissue, and a powdery mildew product is not automatically suitable for tomato leaf spots.
Remove badly affected leaves only when enough healthy foliage remains to support and shade the crop. Avoid handling plants while foliage is wet. Clean soil and sap from tools before disinfecting them, using a product and contact time appropriate for the tool. Keep diseased debris out of a cool home compost pile. Do not strip a plant simply because every older leaf has a blemish.
What to plant in May
Decide from local conditions
Warm-season crops belong outside after frost risk is acceptably low and soil has warmed sufficiently for that crop. A sunny afternoon does not establish either condition. Check the forecast and measure soil temperature at planting depth over several mornings. Local Extension planting calendars supply a better starting window than a hardiness-zone number.
- Cool regions: Continue suitable greens, roots, and peas while temperatures remain favorable. May is not automatically the last opportunity for carrots or beets.
- Mild regions: Transition cleared beds to beans, cucumbers, squash, or other crops with enough growing season remaining.
- Very hot regions: Use locally recommended planting windows; some crops are more productive when planted ahead of peak heat or for autumn harvest.
Direct-sow beans and sweet corn into warm, workable soil. Sow sweet corn in a block rather than one long row to improve wind pollination, and follow seed supplier guidance on separating corn types that cross-pollinate. Choose succession intervals that match how much you eat; another planting every week can create more crop than a household can harvest.
Establish transplants in stages
Plants raised indoors or under protection need gradual exposure to outdoor sun, wind, and temperature changes. Begin with a sheltered position and short outdoor periods, increase exposure over roughly a week, and bring tender plants in when cold threatens. Keep them watered without deliberately wilting them. Hardening reduces transplant shock, but it does not make a frost-sensitive crop frost-hardy. UMN's planting guide covers hardening and transplant handling.
On planting day:
- Water the root ball before removing the pot. A dry plug can remain dry even after surrounding soil is watered.
- Handle the pot or root ball rather than pulling on the stem. Keep cucumber, squash, and melon roots as undisturbed as possible.
- Set most crops at their previous growing depth. Tomatoes can be planted deeper where appropriate; do not apply that practice to every vegetable.
- Firm soil gently around roots and water the planting area thoroughly.
- Check the root ball daily during establishment. Add temporary shade or wind protection if needed, then remove it gradually as growth resumes.
If space is limited, plant fewer healthy transplants at the recommended spacing. Crowding plants to use every spare seedling creates a larger watering, disease, and support workload later.
Match heat-loving crops to the season remaining
Okra, southern peas, sweet potato slips, and yard-long beans are options once soil is thoroughly warm. Peppers and eggplant are usually set out as transplants in climates with a limited frost-free season; starting eggplant from seed outdoors in late May may leave too little time for a worthwhile harvest.
Cilantro and dill can bolt rapidly in heat. Sow small batches if leaf harvest is the aim, or allow selected plants to flower for beneficial insects and seed harvest. Plant basil only when nights are warm enough for good growth. Use a separate marker for each succession so you can assess which planting actually performed best.
Plant maintenance
Investigate slow growth before feeding
Pale leaves do not prove nitrogen deficiency, and purple leaves do not prove a need for phosphorus. Cold soil, waterlogging, damaged roots, unsuitable pH, and transplant shock can all limit nutrient uptake. First check moisture, drainage, temperature, and root condition. Compare affected plants with nearby healthy ones.
Base fertilizer choice on a soil test, previous amendments, and crop demand. Where feeding is needed, measure the bed and apply the labeled amount; a granular 10-10-10 product is not a liquid feed to use at an improvised half-strength rate. Container crops need their own feeding plan because regular watering removes nutrients from the limited root volume. University of Maryland's vegetable fertilizer guide explains crop-specific side-dressing.
Side-dress alongside the root zone, keeping fertilizer off leaves and away from direct contact with stems. Water it in as directed. Heavy feeders may need supplemental nitrogen during active growth, but lush tomato leaves with few flowers are a reason to review nitrogen inputs, not add another general-purpose feed. Finished compost improves soil; compost tea is not a dependable replacement for a measured nutrient application.
Harvest greens and herbs for their intended use
Pick tender lettuce and spinach leaves before bitterness and flowering reduce quality. Harvesting does not prevent the temperature and day-length signals that cause bolting. Once a plant has committed to flowering, replacing it with a more suitable crop is often more productive than repeatedly cutting the flower stalk.
Cut basil above a pair of leaves to encourage branching, leaving enough foliage for recovery. Remove flower buds on plants grown for leaves, while allowing a separate plant to bloom if desired. Avoid harvesting a newly planted herb so heavily that it cannot establish roots.
Care for spring flowers and shrubs
Leave daffodil and other spring-bulb foliage until it yellows naturally. Do not braid it or cut it down while green; leaves replenish the bulb after flowering. Remove spent flower heads if unwanted seed production is the concern, and mark crowded clumps for lifting at the appropriate dormant stage.
If lilacs, forsythias, or other shrubs flowering on last year's wood need pruning, do it soon after bloom. Remove selected old or misplaced stems rather than shearing every branch to one height. Later pruning can remove next year's flower buds. Identify the shrub first: hydrangea pruning, in particular, depends on species and cultivar. UMN's pruning guidance distinguishes flowering habits and disease-sensitive timing.
Supporting pollinators as flowering begins
Squash and many cucumbers need insects to move pollen between flowers. Tomatoes and beans usually self-pollinate, while sweet corn relies on wind. Establish which process your crop needs before treating poor fruit set as a pollinator shortage.
Squash male flowers have a plain stalk; female flowers have a small immature fruit behind the petals. Male flowers often appear first. If both sexes are open and bee visits are scarce, transfer pollen from a freshly opened male flower to a female flower of the same crop in the morning. Mark the flower and check whether the fruit enlarges over the following days. Heat, water stress, and other problems can still cause fruit loss after pollination.
Check cucumber labels: some cultivars form fruit without pollination and have different requirements. Do not assume every shriveled blossom needs hand pollination. Illinois Extension explains squash and cucumber fruit-set problems.
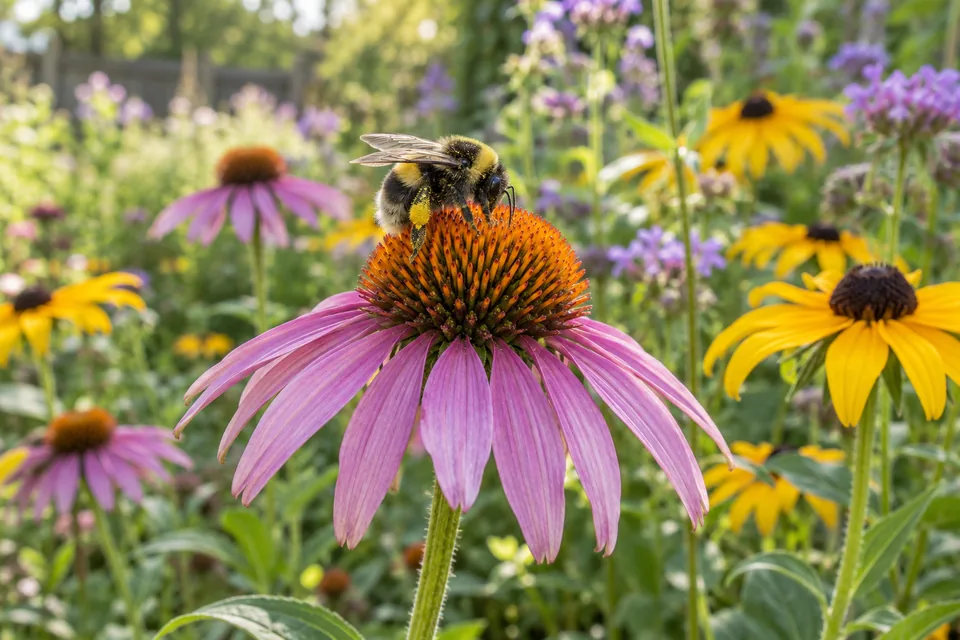
Maintain flowering plants through the season, including locally appropriate native species and a few flowering herbs. Protect nesting habitat where practical. When a pesticide is necessary, follow all pollinator restrictions on its label; an evening application does not automatically make a persistent product safe the next morning. Keep sprays off flowers and avoid treating while bees are visiting.
Watering efficiency
Test irrigation before demand peaks
Run every irrigation section while you can see it. Look for leaks, disconnected fittings, pinched hoses, and dry areas at the ends of lines. A running timer does not prove water reached the plants.
Check moisture between emitters as well as directly beneath them. As roots spread, a single wet spot beside the stem may be too small; add or reposition emitters to cover the active root area. Flush lines and clean filters according to the manufacturer's instructions. Keep mulch over suitable drip lines while leaving connections accessible for inspection.
For hand watering, time how long the hose takes to fill a known-volume container. This helps estimate delivery instead of judging by how long you stood at the bed. Recheck soil afterward because fast delivery can run off before soaking in. Hand watering is effective when enough water reaches the root zone. UMN's hot-weather guide includes watering-volume examples.
Set priorities for dry weather
Give establishment and active crop development priority: new transplants, flowering beans, enlarging roots, and developing fruit are more vulnerable to a missed watering than dormant or well-established drought-tolerant plants. Group pots by their actual watering needs, not simply by location. Use shade where appropriate to reduce stress, and adjust timers after rain rather than retaining a daily schedule all season.
Sources and further reading
- University of Minnesota Extension: Planting the vegetable garden
- University of Maryland Extension: Fertilizing vegetable gardens
- Clemson Extension: Insecticidal soaps for garden pest control
- University of Minnesota Extension: Squash bugs
- University of Illinois Extension: Growing cucurbits and understanding fruit set
- University of Minnesota Extension: Pruning trees and shrubs
- University of Minnesota Extension: Gardening in hot weather