April is a planting month in many gardens, but the appropriate crop depends on local conditions. A northern garden may still be preparing for its first peas while a warmer garden is setting out tomatoes. This guide follows Northern Hemisphere spring: use soil conditions, the forecast, and a local planting calendar instead of assigning dates from a hardiness zone.
April tasks
Put the most time-sensitive work first
Start each garden visit with newly planted beds and containers. A dry root ball, a slug feeding on emerging lettuce, or a loose cover needs attention before another tray is sown. Work through these checks:
- Moisture: Feel the original transplant root ball and the surrounding soil. They can have different moisture levels.
- Weather protection: Check the forecast, repair cover gaps, and ventilate tunnels before a sunny afternoon.
- Emergence and damage: Examine seed rows for gaps, crusting, clipped stems, or fresh holes.
- Harvest: Pick ready greens and radishes before quality declines, then identify which space is becoming available.
- New planting: Sow or transplant only after confirming suitable soil, enough growing time, and room at maturity.
Keep a short record of what was planted and what needs checking next. A dated photograph of a problem plant gives a better comparison than memory. Note recent rain, irrigation, feeding, and cold weather beside the image; these often explain changes in growth.
Weed early without damaging soil
Remove annual weeds while they are small, working only when soil is dry enough to crumble. Use a shallow hoe between rows on a drying day and hand-weed near delicate seedlings. Deep hoeing close to vegetables damages their roots and brings more weed seed to the surface. The weed guide explains why shallow hoeing works.
Identify persistent weeds before chopping through them. Repeatedly slicing a bindweed or couch-grass root system can distribute viable pieces. Mark those patches and use a control method suited to the species. Keep paths passable and the base of transplants visible so irrigation leaks, stem damage, and slugs are easier to find.
Transplanting warm-season crops
Check the forecast and the plant
Do not transplant tomatoes, peppers, eggplant, or basil simply because April has arrived. These crops need warm soil and sufficiently mild nights as well as low frost risk. Tomatoes generally establish better once nights remain above about 50°F; peppers, eggplant, and basil need warmer conditions. A run of chilly nights can suppress growth even when no frost occurs.
Check roots and foliage before buying or planting. Select compact plants with sound stems, healthy new growth, and a root ball that holds together without being a dense mat of circling roots. Avoid seedlings with unexplained leaf spots or insects beneath the leaves. Keep a suspect new purchase away from existing trays until identified rather than introducing a problem to every plant.
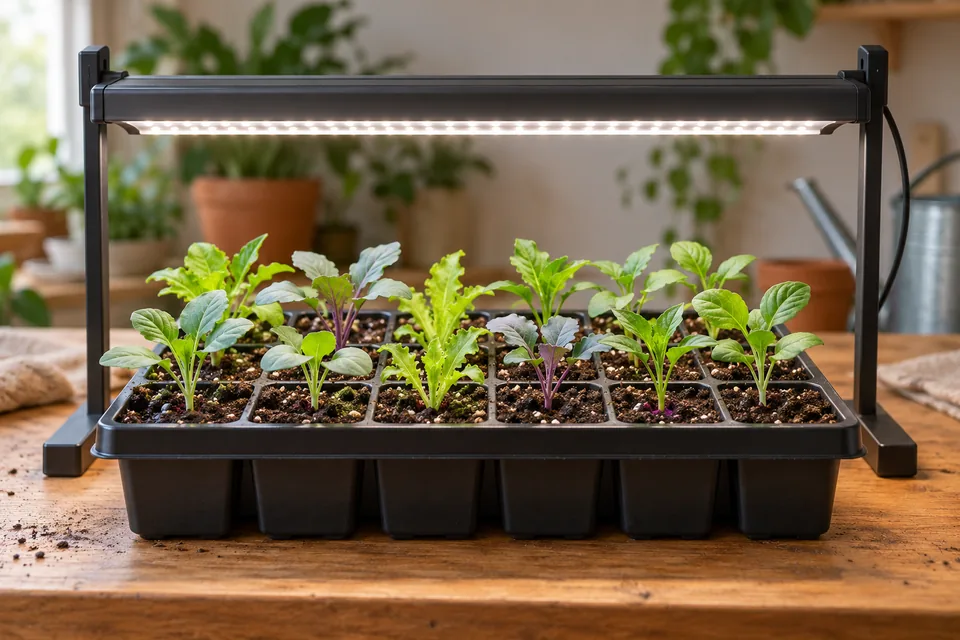
Harden seedlings off over roughly one to two weeks, increasing outdoor light and wind exposure gradually. Keep them watered without making them wilt deliberately, and bring tender plants under shelter during cold nights. A plant that has spent its whole life in a greenhouse may still need this transition even if it was bought outdoors that morning.
Set plants at the right depth and spacing
Water pots before planting, choose a calm afternoon or cloudy day, and handle the root ball gently. Make each hole large enough for the roots, backfill with the surrounding soil, and water slowly to settle it. Most vegetable transplants go at their original depth.
Ordinary tomato seedlings can have part of their stem buried to form additional roots. Remove leaves that would end up below soil; use a shallow trench for a leggy plant if a deep hole would put roots into cold soil. Keep a grafted tomato's union above the soil so the scion does not root around the rootstock. Set peppers and eggplant at their original growing depth. See Minnesota Extension's tomato guidance.
Use mature spacing from the variety and support system, not the apparent space needed by today's small plant. An indeterminate tomato in a cage can occupy far more room than a compact container cultivar. Allow access to harvest and inspect plants without stepping into beds. Write the variety and planting date on a durable label.
Choose and install supports now
Install tomato cages, stakes, or a supported weave system at planting. Match the support to the mature plant: small decorative cages often cannot hold a full-sized indeterminate tomato carrying fruit. Firmly anchor the structure before roots spread through the bed.
A stake supports a plant tied to it individually. A Florida weave supports a row between successive horizontal runs of twine secured to sturdy stakes; it is not simply a single string tied to each stem. Choose a system you can maintain as growth accelerates, and follow pruning guidance for that system. Do not remove all tomato side shoots indiscriminately, particularly on determinate varieties.
Install pea and pole-bean trellises when sowing. Bush beans generally need no trellis. Give cucumbers a structure their tendrils can grip, and choose compact or small-fruited squash varieties if growing vertically. Heavy fruit may need individual support later; plan for its weight now.
Manage protection after planting
Secure frost cloth to the ground and support it above delicate plants. Keep enough slack for growth and check fabric after wind. Frost protection varies with the cover and weather; it cannot reliably make a long freeze harmless to tender vegetables.
Use insect mesh or suitable row cover before pests reach a vulnerable crop, then inspect beneath it. Seal every edge and repair holes. A cover placed over an infested bed can protect the pest as effectively as the crop. Remove or open covers when pollination is needed: most cucumbers, melons, and squash require insect access at flowering. Leafy crops can often stay covered longer if temperatures remain suitable. Maryland Extension explains weather and pest protection for vegetables.
Plastic tunnels and cloches need ventilation on sunny days. Check the temperature inside rather than using the outdoor forecast alone. Rain may not reach a sheltered root ball, so include covered beds in moisture checks even after a shower.
Companion planting and interplanting
Plan for harvest timing and mature size
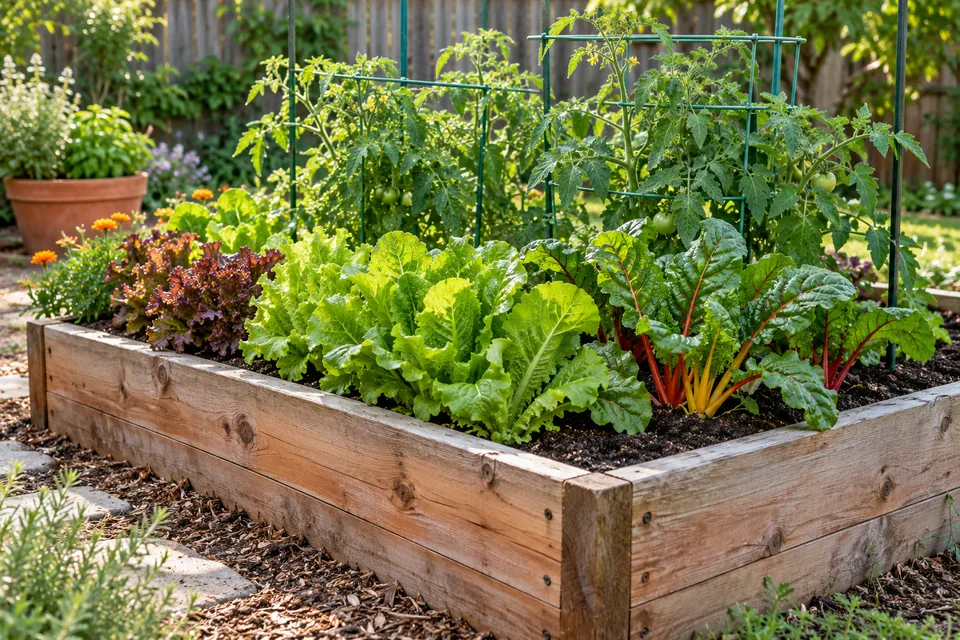
Interplanting works when one crop uses space that another will need later. A short row of radishes between newly planted tomatoes can be harvested before tomato foliage fills the gap. Small lettuce plants can serve the same purpose if you are willing to harvest them as young heads or leaves.
Mark the eventual spacing of the main crop first. Plant the temporary crop between those positions, then set a removal target based on growth. Do not assume every radish or lettuce variety will be ready in 30 days: weather and the intended harvest size change the calculation. If temporary plants begin crowding the main crop, harvest them small.
Plan watering access as carefully as spacing. A drip emitter beside a tomato may leave the interplanted lettuce row dry. Conversely, frequent surface watering for newly sown carrots may keep an adjacent established plant unnecessarily wet. Group crops where their immediate watering needs can be met without saturating the whole bed.
Use flowers for a defined purpose
Flowering herbs and other suitable flowering plants can supply nectar and pollen to beneficial insects. Leave a small, deliberately chosen patch of dill or cilantro to flower where it will not shade seedlings or obstruct paths. Include plants that flower at different times rather than relying on one brief display.
These plantings support habitat; they do not guarantee that aphids, caterpillars, or other pests will remain below damaging levels. Continue inspecting crops. Pairings such as basil beside tomatoes should earn their place through harvest, compatible spacing, or flowers rather than an assumed improvement in flavor or universal pest repellence. Maryland Extension discusses practical succession and companion planting.
Treat trap cropping as a managed technique
A trap crop must attract the specific pest more strongly than the crop you want to protect. It also needs inspection and a plan to remove or manage pests accumulating there. Planting nasturtiums near squash does not reliably establish protection against squash bugs, and a neglected trap planting can become a source of pests.
For a small garden, well-sealed insect mesh is often simpler to manage than a trap crop. If trying trap cropping, use a locally tested crop-and-pest pairing, plant it at the recommended time, and compare damage inside the protected crop. Minnesota Extension describes specific mustard and brassica trap-crop research in its flea beetle guide.
What to plant in April
Continue cool-season planting while there is time to finish
Peas, lettuce, spinach, radishes, carrots, beets, and arugula may still have a useful spring planting window. In cooler regions, April can be the beginning of that window. In warmer regions, another sowing may mature during unsuitable heat. There is no universal early-April cutoff.
Read the variety's approximate days to harvest and compare that with your usual heat pattern. Check whether the stated days begin at sowing or transplanting. Allow extra time for cold starts, and choose a quicker crop if the remaining window is short. Spring radishes and baby greens are easier to fit into a narrowing window than a late sowing of shelling peas.
Let existing crops guide the next batch. Lettuce developing an elongated center stem and spinach forming flower stalks are approaching bolting. Harvest usable leaves promptly and reconsider another sowing of the same variety in the same conditions. Heat-tolerant lettuce can extend harvest, but it still has limits. Carrots and beets are not automatically finished for the season when April ends.
Begin warm-season sowing when conditions qualify
Beans, corn, squash, cucumbers, and melons need adequately warm soil and a suitable frost outlook. Follow the crop and variety instructions: a minimum temperature at which seed can germinate is different from a temperature that gives quick, even emergence. Maryland Extension's planting guidance explains why cold, wet soil is a poor start for these crops.
Sow modest amounts of bush beans at intervals if you want repeated harvests. One healthy pole-bean planting often produces for much longer. Plant corn in blocks with enough plants flowering together for pollination; splitting a small bed into numerous tiny successions undermines that aim. Allow squash and melon plants their full eventual footprint, including access to nearby beds.
Start stored cannas, dahlias, or other tender plants under suitable protection if you want an earlier start, but keep them indoors until their outdoor planting window. Check stored material for rot and discard unusable pieces. Follow species-specific potting and planting depth rather than treating every tuber, bulb, or rhizome alike.
Diagnose stalled transplants before feeding
Some adjustment after planting is normal, but persistent wilting, collapsing stems, or declining new growth needs investigation. Check the following before adding fertilizer:
- Wilted plant, dry original root ball: Water that root ball slowly and recheck absorption. Water can run around a dry pot-shaped plug without wetting it adequately.
- Wilted plant, saturated soil: Stop adding water and investigate drainage or damaged roots. More irrigation can worsen oxygen shortage.
- Purple leaves after cold nights: Chilled roots can limit phosphorus uptake even when soil contains enough. Check temperature before applying phosphorus.
- Pale older leaves: Nitrogen shortage is one possibility, but waterlogging, root damage, and poor establishment can produce similar symptoms.
- Bleached or scorched exposed leaves: Review the hardening process, recent sun, wind, and sprays. New, healthy growth is a better recovery signal than expecting damaged tissue to turn green again.
Compare affected plants with healthy ones of the same variety. A problem confined to a low corner suggests drainage; symptoms across plants sprayed together suggest checking that treatment. Photograph the whole plant and both leaf surfaces, and seek a local diagnostic service if the cause remains unclear. Maryland Extension's tomato problem key helps separate common symptoms.
Use soil-test recommendations and the crop's needs to decide fertilizer amounts. Account for compost, slow-release fertilizer, or starter fertilizer already applied. Routine half-strength feeding every fortnight can still overfeed plants and does not repair cold or waterlogged roots.
Pest and disease management
Make scouting repeatable
Inspect the same representative plants each week, plus any plants that look different. Check vulnerable seedlings more often because a small amount of feeding can remove much of their leaf area. Examine growing tips, both leaf surfaces, stems at soil level, and nearby weeds.
Record the number of plants affected, whether damage is on old or new leaves, and whether pests are present. For example, “aphids on two of ten pea tips, no distortion” is useful next week; “lots of bugs” is not. Look for predators and parasitized aphids as well as pests. Old holes cannot heal, so judge success by healthy new leaves and reduced fresh damage.
Set an action point appropriate to the crop. A few holes in an established kale leaf may be tolerable, while the same feeding on a tiny eggplant demands prompt attention. For pests that transmit important diseases locally, obtain crop-specific advice rather than waiting for extensive feeding damage.
Respond to the pest you identify
- Aphids: Look for clusters on soft growth, curled leaves, and sticky honeydew. A firm water spray can remove exposed colonies; protect delicate seedlings from a damaging jet. Inspect again in a few days.
- Slugs and snails: Search at dusk and beneath nearby shelter when leaves have irregular holes and slime trails. Handpick, reduce excess damp cover around seedlings, and use labeled bait only if needed.
- Flea beetles: Look for small jumping beetles and fresh shot holes. Protect susceptible young plants with sealed mesh or row cover. Healthy established plants tolerate more feeding than seedlings.
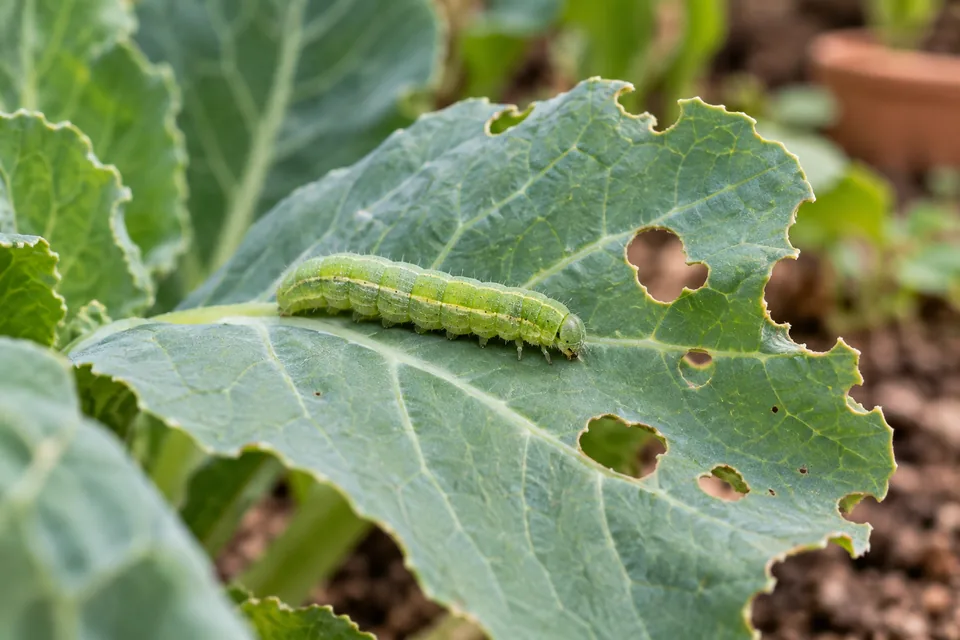
- Caterpillars on brassicas: Check leaf undersides and the growing center for larvae and droppings. Handpick where practical and close gaps in insect covers.
- Collapsed seedlings: A pinched, decayed stem near the soil line can indicate damping-off. Remove affected seedlings and address wet growing conditions; a fungicide cannot restore a collapsed stem.
Lady beetle larvae, lacewing larvae, and hoverfly larvae can be valuable predators despite looking unlike their adults. Aphid mummies—swollen, often tan bodies—indicate parasitic wasp activity. Preserve these helpers and avoid treating a stable colony simply because it is visible. UC IPM provides photographs and treatment options in its aphid guide.
If treatment is necessary, select a product labeled for the identified pest and the edible crop. Insecticidal soaps and horticultural oils depend on contacting the pest and can also harm beneficial insects they hit. Test sensitive foliage as directed and observe temperature, application, and harvest restrictions. Household detergent mixtures are not a substitute for a labeled insecticidal soap.
Prevent disease through growing conditions
Maintain spacing, keep plants supported, and remove weeds that crowd the canopy. Direct irrigation toward roots where practical and water early when foliage will get wet. Avoid handling or pruning wet foliage, which can move some pathogens between plants. Clean debris from tools and disinfect when disease transmission is a concern, using a suitable product according to its directions.
Remove badly diseased tissue when that is appropriate to the diagnosis, without stripping a plant of most of its functional leaves. Keep material carrying persistent or uncertain disease out of a cool home compost pile. Rotate related crops where space permits, but recognize that rotation alone cannot prevent windborne disease or every soilborne problem.
Brown tomato leaf spots can have fungal, bacterial, or noninfectious causes. Rings in lower-leaf lesions suggest early blight but are not sufficient for every diagnosis. Minnesota Extension's tomato leaf-spot guide explains why identification matters before selecting treatment.
Base fungicide decisions on disease risk
Do not start a whole-garden spray schedule because April has arrived or mildew appeared sometime last year. Identify the vulnerable crop and disease, use resistant varieties where available, and consult local reports for current risk. Some diseases justify preventive treatment before symptoms; the need and timing depend on that specific disease.
Powdery mildew is not the same disease as early blight, and sulfur or potassium bicarbonate is not a universal answer to both. Powdery mildew can develop without prolonged leaf wetness, so watering at soil level alone will not prevent it. Follow disease-specific guidance, such as Minnesota Extension's cucurbit powdery mildew guide. Fungicides protect susceptible tissue; they do not rebuild leaves already damaged.
Watering and support
Test irrigation before covering it with foliage or mulch
Reconnect hoses, flush lines according to their instructions, clean filters, and check fittings. Use the pressure regulation specified for the system. Run it while you can watch, checking the beginning, middle, and end of each line for leaks, blocked outlets, and uneven delivery.
After a test run, use a trowel to inspect the wetting pattern beside plants. A damp spot directly beneath an emitter can hide dry soil a few inches away. Sandy soil tends to need closer outlet spacing than soil that spreads water farther sideways. Reposition lines or add outlets where necessary instead of extending every watering cycle to compensate for one dry patch. Minnesota Extension explains drip layout and equipment.
Set a timer from observed soil wetting, then adjust for rainfall and plant growth. Automatic watering still needs inspection. Keep seedbeds and newly planted root balls under closer observation than established, mulched beds. Their smaller root systems cannot draw on the same reserve of water.
Match watering to roots and growth stage
Feel the soil below the surface before watering. Check within the seedling root zone, not only several inches beneath it, and gradually assess deeper as plants establish. Water slowly enough for infiltration, stopping or dividing an application if runoff or puddling begins.
Flowering peas, developing heads of lettuce, and swelling root crops need consistent moisture. Record meaningful rain with a gauge and check whether it penetrated the canopy and mulch. A brief shower may wet leaves without reaching roots. In-ground beds, raised beds, and containers will not necessarily need water on the same day. Use the principles in Minnesota Extension's irrigation guidance.
Hand watering works well in a small garden. A gentle overhead spray can also help a newly sown seedbed stay evenly moist; use it early enough for foliage to dry. Drip is useful for established rows, but no irrigation method is effective if it misses the active roots.
Mulch after soil has warmed sufficiently
Remove weeds and water dry soil before applying mulch. Organic mulch slows soil warming, so keep it back from cold beds until the crop has suitable root-zone warmth. Around established transplants, a loose layer of roughly 2–3 inches is often useful; keep stems and crowns clear.
- Straw: Useful around vegetables, but not guaranteed seed-free. Ask about herbicide history and watch for volunteer grain or weeds.
- Shredded leaves: Break down into organic matter. Shredding reduces the tendency of whole leaves to mat into a dense layer.
- Wood chips: Useful on paths and perennial beds. Leave them on the surface; incorporating substantial amounts into annual beds can temporarily tie up nitrogen.
- Grass clippings: Use untreated material in thin layers allowed to dry between additions. Thick, fresh clumps mat and become unpleasant to handle.
- Plastic mulch: Plan irrigation underneath it before installation. Monitor temperature and remove the material at the end of its useful life.
Guide climbing growth onto supports while stems are flexible. Tie tomatoes loosely with soft material, keeping a gap for the stem to thicken; a figure-eight tie separates the stem from the stake. Recheck ties and anchoring during each weekly inspection rather than waiting for wind or fruit weight to reveal a weakness.
Sources and further reading
- University of Minnesota Extension: Growing tomatoes in home gardens
- University of Maryland Extension: Vegetable garden weather and pest protection
- University of Maryland Extension: Vegetable succession and companion planting
- University of Minnesota Extension: Flea beetles
- University of Maryland Extension: When to plant vegetables
- University of Maryland Extension: Key to common problems of tomatoes
- University of California IPM: Aphids
- University of Minnesota Extension: Tomato leaf spots and their causes
- University of Minnesota Extension: Powdery mildew of cucurbits
- University of Minnesota Extension: Irrigation equipment and layout
- University of Minnesota Extension: Irrigation strategies for vegetables