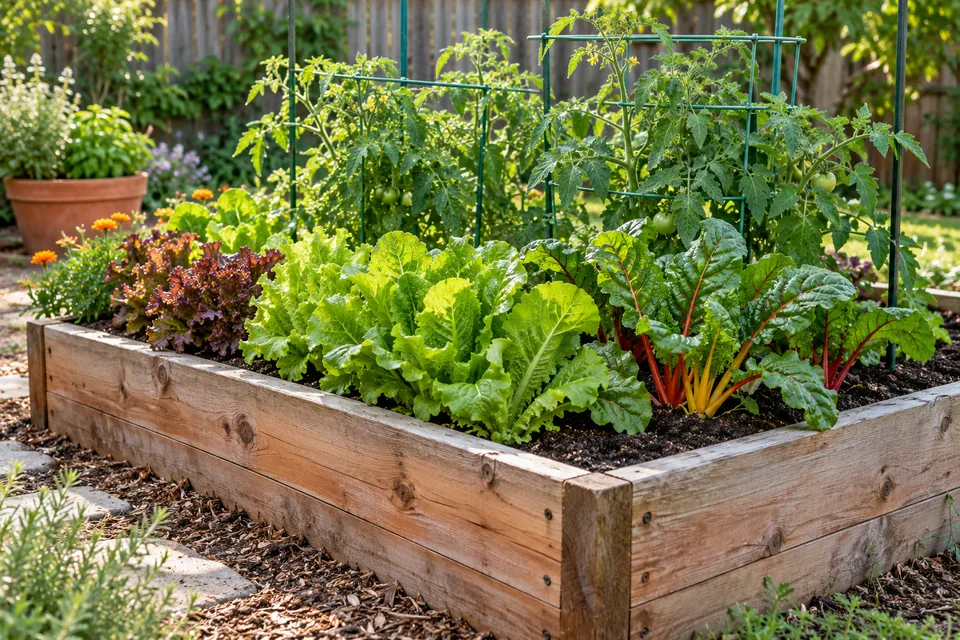
March can bring thawing ground, a full cool-season harvest, or the first warm-season planting window. This guide follows Northern Hemisphere spring conditions. Choose tasks by soil readiness and the crop's requirements; a hardiness zone describes winter cold and cannot supply a reliable spring planting date.
March tasks
Decide which beds are ready
Check moisture before temperature. Dig a small sample from the depth you intend to work, rather than judging the dry surface. Squeeze it, then press the ball with a finger. If it smears, sticks to tools, or stays in a dense lump, leave that bed alone. Workable soil breaks apart without smearing. Sandy soils may never form a firm ball, so also check for standing water and saturated layers below.
Keep feet and wheelbarrows on paths. Cultivating wet soil compresses pore spaces, restricts drainage, and leaves hard clods after drying. A raised bed can be ready before the surrounding ground, but it still needs checking. When only one bed is workable, plant that bed and leave the others covered.
Measure soil temperature where seeds will grow
Use a soil thermometer in several spots at the intended sowing depth, commonly 1–2 inches for vegetables. Take readings at a consistent time for several days; an afternoon reading after sunshine can hide cold overnight conditions. Check deeper in the root zone before transplanting.
- Cool-season seeds: Peas, spinach, radishes, and lettuce can germinate in cool soil, although emergence slows near their minimum temperature.
- Carrots and beets: Allow extra time in cold beds. A warm afternoon does not mean the seedbed will stay warm overnight.
- Beans and other warm-season seeds: Wait for reliably warm soil and a suitable forecast. Cold, wet conditions increase seed decay.
- Melons and other heat-demanding crops: Their requirements are higher than those of peas or lettuce. Read the crop's sowing instructions rather than using one temperature for the whole garden.
A minimum germination temperature means some seeds can germinate; it does not mean emergence will be quick or uniform. Maryland Extension explains the distinction in its guide to poor seed germination.
Pull thick winter mulch back from the particular rows you intend to sow so sunlight can reach the soil. Leave other beds protected. South-facing beds may warm sooner, but measure them rather than assuming a fixed temperature advantage. Clear plastic can warm an empty bed but also encourages weeds; black plastic suppresses many weeds. Neither protects future foliage from frost. Remove temporary covers before sowing, or install an appropriate planting and irrigation system if using plastic as season-long mulch.
Use frost dates as planning information
Check a local weather station's last-frost probabilities and the forecast. A spring date with a 10% chance of a later freeze still carries risk; it is not a deadline after which protection becomes unnecessary. Low spots, exposed beds, and sheltered walls may behave differently from the station.
Separate frost-hardy plants from frost-tender ones when making a planting list. A dormant apple tree and a tomato seedling should not wait for the same temperature signal. Keep covers ready for vulnerable plants already outdoors and bring movable tender seedlings under shelter when cold is forecast.
Keep indoor seedlings growing while beds catch up
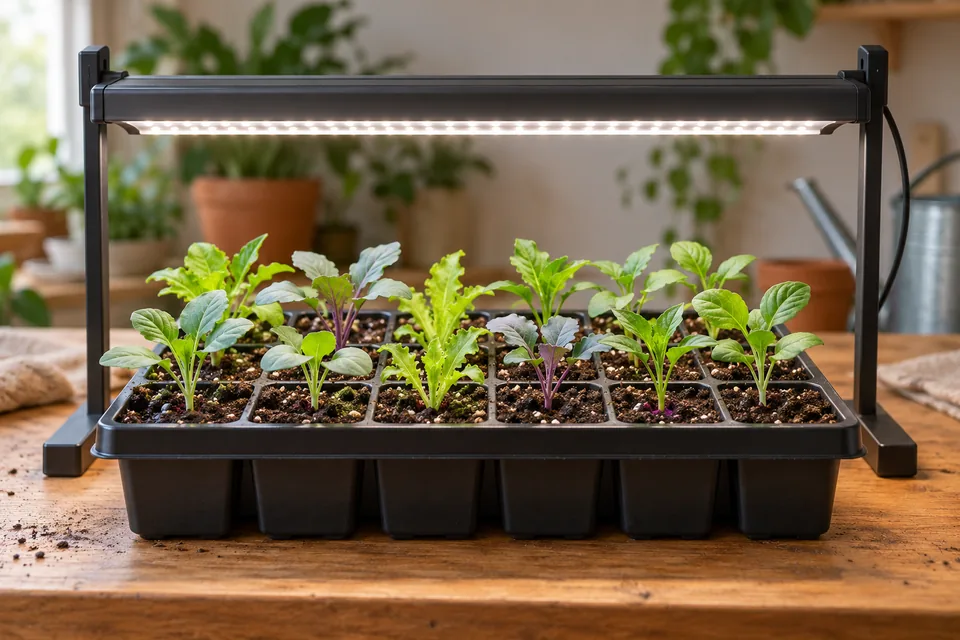
If planting is delayed, inspect seedlings before starting another tray. Roots tightly circling the cell, pots drying very quickly, and slowed growth can indicate that seedlings need more room. Move suitable crops such as tomatoes into slightly larger pots with drainage and fresh potting mix. Handle seedlings by a leaf or root ball, not by crushing the stem.
Keep labels attached and record the sowing date. Maintain strong light and enough space that leaves are not permanently overlapping. Water when the mix needs it, letting excess drain; do not keep the tray standing in water. If the mix contains fertilizer, account for it before adding feed. A stalled seedling is not automatically hungry: cold roots, poor light, and saturated mix also limit growth.
When to transplant warm-season crops
Check readiness for each crop
March transplanting of tender crops is appropriate only in sufficiently warm locations. Elsewhere, this month's job is growing healthy seedlings for a later planting window. Readiness requires all three conditions: a hardened plant, sufficiently warm soil, and acceptably low frost and chilling risk.
- Tomatoes: Wait until frost danger has passed and nights are consistently mild, generally above 50°F. Soil around 60°F or warmer is a useful home-garden target.
- Peppers and eggplant: Allow warmer conditions than tomatoes; cold nights and cold root zones can leave them stalled even without frost.
- Basil: Treat it as a heat-loving tender crop. Keep it sheltered through cold spring nights rather than planting it alongside hardy parsley.
- Tender ornamentals: Check the species' requirements. A plant surviving outdoors for one warm day does not establish that it can stay out overnight.
Review the coming week's weather before committing the whole planting. Keep a few backup plants if attempting an early crop. Hardening improves tolerance to sun, wind, and changing conditions; it does not make a tomato frost-hardy.
Harden off gradually
Begin roughly one to two weeks before the expected move outdoors. Start with a few hours in a sheltered, lightly shaded position. Over subsequent days, increase time outdoors, direct sun, and exposure to normal breezes. Return tender plants to shelter during cold nights or strong winds.
Check small pots during each outing because wind and sun dry them faster than indoor conditions. Do not deliberately wilt seedlings to toughen them. Bleached patches, crispy edges, or persistent wilting mean exposure increased too quickly: reduce it and assess moisture before continuing. The final stage is a full day in conditions similar to the planting site, with nights outdoors only when temperatures suit the crop.
Plant without damaging the root ball
- Choose a calm, cloudy period or late afternoon. Water the pots beforehand so the root balls are moist and hold together.
- Mark mature spacing, keeping room for access and supports. Dig a hole that accommodates the root ball without crushing it.
- Slide the plant from its pot while supporting the roots. Keep fragile cucumber and squash roots especially undisturbed.
- Set most seedlings at their original depth. Ordinary tomato seedlings can have part of the stem buried after removing lower leaves; keep a grafted tomato's graft union above soil.
- Backfill with the surrounding soil, firm gently, and water slowly to settle soil around the roots.
- Label the plant and install support immediately. Check moisture in the original root ball as well as in the adjacent soil over the following days.
A shallow trench can accommodate a leggy tomato without placing its roots in a much colder deep hole. Minnesota Extension illustrates this method in its tomato growing guide. Do not put concentrated fertilizer in direct contact with roots.
Use covers within their limits
Frost cloth works by reducing heat loss; it does not create heat. Support it above fragile plants and secure the edges to the ground so stored soil warmth stays enclosed. Protection depends on fabric weight, wind, soil warmth, and the severity and duration of cold. Consult the cover's rating and keep a thermometer beneath it when testing a setup.
Vent plastic tunnels and cloches during sunny days and remove opaque overnight covers in the morning. A sheltered plant can overheat even when outdoor air feels cool. If sustained freezing weather is forecast, delay transplanting or move pots indoors; an improvised cover is a poor substitute for a suitable planting window.
What to direct-seed in March
Select crops for the remaining cool season
Peas, spinach, lettuce, radishes, arugula, turnips, carrots, and beets are candidates once soil is workable and warm enough for the species. Fava beans suit some cool-season climates; consult a local planting calendar for whether spring or autumn sowing works best. These are possibilities, not a requirement to sow every crop in March.
Check the time to harvest against your usual arrival of heat. A quick radish crop may fit a short cool window when a late pea sowing will not. In cold regions, sowing may need to wait until April or later. In warmer areas, March can be the end of the spring pea and spinach window.
Make a seedbed that supports even emergence
Prepare only the upper layer needed for sowing, breaking large clods and removing weeds. Water a dry bed before sowing and let excess drain. Mark straight, labeled rows so emerging crops can be distinguished from weeds.
Use packet depth and final spacing for the variety. Typical starting points are about 1 inch deep for peas and beans and roughly ¼ inch for carrots and lettuce; soil texture and the seed packet may call for adjustments. Cover fine seed lightly, firm the surface gently for seed-to-soil contact, and water with a fine rose or gentle nozzle. A forceful jet displaces seeds and can leave a surface crust.
Keep the shallow sowing layer moist until seedlings establish. Deep watering that leaves the top quarter-inch dry will not help a newly germinating carrot there. On the other hand, repeatedly flooding cold soil removes air and promotes decay. Check the seed row itself each day in drying weather. Maryland Extension's carrot guide covers bed preparation and thinning.
Diagnose a missing row before resowing
Record sowing date and expected emergence on the label. If seedlings have not appeared by the packet's range, allow for slower germination in cool soil, then gently uncover several seeds in a short sample section.
- Firm, unsprouted seed: Check temperature and moisture; more time may be enough.
- A live shoot trapped under a crust: Moisten the surface gently rather than raking through the row.
- Soft or decayed seed: Re-sow when drainage and temperature improve; adding more seed to the same conditions repeats the failure.
- Empty spaces or clipped shoots: Look for slugs, birds, rodents, or cutworms before assuming germination failed.
Thin after establishment, following the crop's final spacing. Beet seed clusters can produce several seedlings, so a neatly spaced row may still need thinning. Snip crowded seedlings where pulling would disturb neighboring roots.
Reserve warm-season sowing for warm beds
Beans, sweet corn, squash, cucumbers, and melons need a separate decision from the cool-season crops. Use the variety's soil-temperature guidance and local frost window. Some sweet corn types tolerate cooler sowing than others; supersweet varieties generally need warmer soil. Plant corn in a block of several short rows for pollination, at the packet's final spacing, rather than leaving plants just a few inches apart in one long row.
For peas, install trellising at sowing. Pole beans also need supports at planting; bush beans normally do not. If peas have not grown in the bed before, consider a fresh inoculant labeled for peas. Rhizobia are crop-specific, and inoculation is not a guaranteed yield increase where compatible bacteria are already present. Follow storage and application directions; see Minnesota Extension's pea and bean inoculant guidance.
Bare-root and perennial planting
Receive and plant dormant stock promptly
Bare-root trees, berries, and roses arrive without a soil ball and must not dry out. Unpack promptly, inspect roots, and contact the supplier about shriveled, moldy, or badly damaged stock. If soil is frozen or saturated, keep plants cool with roots in moist packing, following the supplier's storage instructions. Keep them out of heated rooms that encourage premature growth.
Prepare the hole before exposing roots to wind. Remove broken roots with clean tools and spread healthy roots without bending them upward. Set a tree's root flare, or uppermost main roots on young stock, at the appropriate finished soil level. Do not rely only on a dark nursery stain: stock can have been buried too deeply. Keep the graft union of a grafted fruit tree above soil, following its rootstock guidance. Roses have different graft-depth recommendations by climate; use the supplier's directions.
Backfill with the excavated soil, water thoroughly, and mulch without covering the trunk or crown. Avoid creating a rich pocket of compost inside otherwise dense soil. Maryland Extension provides specific bare-root planting instructions.
Establish edible perennials at the correct depth
Remove perennial weeds and confirm drainage before planting a bed intended to last many years. Place asparagus where its mature ferns will not shade short vegetables. Set dormant crowns at the depth recommended for your soil; heavy soils require shallower planting than very sandy soils. Backfill as directed as shoots develop, and leave a new planting unharvested while it establishes. Consult the asparagus planting guide for trench depth and establishment stages.
Plant bare-root strawberries with the crown at soil level and roots directed downward; neither bury the growing point nor leave roots exposed. Rhubarb needs ample space and drainage; set the crown according to the supplied stock's instructions. Plant only when the ground is workable, whether that occurs in March or later.
Divide for a reason
A dead center, smaller flowers, or a clump crowding its neighbors can justify division. There is no requirement to divide every perennial on a fixed three-year cycle. Spring is a useful window for many summer- and autumn-flowering clumps when new growth is still short. Leave plants in active bloom undisturbed, and check species-specific timing for peonies, irises, and other exceptions.
Water a dry clump beforehand. Lift with a fork or spade, retain vigorous outer sections with roots and growing points, and discard dead centers. Replant promptly at the original depth and water in. Keep divisions moist while roots establish. Minnesota Extension's division guide includes plant-specific intervals and timing.
Succession planting strategy
Allocate space before opening packets
Divide a bed into labeled sections, then sow only what your household can use during one harvest period. For example, reserve three short rows for radishes and sow the second after the first has emerged. Leave the third until you can see whether growth is accelerating or slowing. Record the variety, row length, sowing date, and first harvest; next year these records will be more useful than a generic calendar.
Intervals of roughly one to two weeks are a starting point for quick crops, not a rule for every vegetable. Later sowings can catch earlier ones as soil warms. If two batches are approaching harvest together, delay or reduce the next sowing. If the first batch is nearly finished with nothing following it, shorten the interval while the crop still has suitable weather ahead.
Plan the handover between crops
Use lettuce, radishes, cilantro, and bush beans where repeated small sowings suit the harvest. A single chard planting can yield repeatedly, while indeterminate tomatoes and pole beans often produce over a long season without weekly replanting. Corn needs adequate blocks in each sowing for pollination; do not split a tiny patch into many poorly pollinated batches.
Write the next crop beside the current one on the bed plan. A spring lettuce section may later hold beans once the soil is warm. Allow room for the successor and remove a spent crop promptly instead of letting it shade a new planting. Stop sowing cool-season crops when they are unlikely to mature in suitable conditions; shade can moderate heat but cannot prevent all bolting responses. Maryland Extension explains succession and interplanting options.
Early-season pest watch
Inspect newly emerged rows frequently: losing two leaves matters more to a seedling than to a mature plant. Look at the damage, the soil surface, and leaf undersides before selecting a response.
- Cut stems at ground level: Search nearby soil for curled cutworms, especially at dusk. Remove larvae and place collars around vulnerable transplants, extending below and above the soil. Collars reduce damage but do not stop every climbing species. See the Minnesota cutworm guide.
- Ragged holes and slime trails: Look for slugs under pots or boards and handpick after dark. Move excess damp mulch away from tiny seedlings. If using bait, choose a product labeled for the site and follow its placement directions.
- Small shot holes with jumping beetles: Install insect mesh or row cover over susceptible seedlings and seal the edges. Check beneath it regularly; covers also trap pests already present.
- Rotting seeds in cold, wet ground: Seedcorn maggots are one possible cause. Avoid incorporating fresh organic material immediately before planting susceptible crops, and wait for conditions that support prompt emergence.
Record which beds develop problems and whether damage is spreading. Protecting one vulnerable row can be enough; a calendar-based whole-garden spray does not address the cause.
Sources and further reading
- University of Maryland Extension: When to plant vegetables
- University of Maryland Extension: Poor germination of vegetable seeds
- University of Minnesota Extension: Growing tomatoes in home gardens
- University of Maryland Extension: Growing carrots in a home garden
- University of Minnesota Extension: Pea and bean inoculants
- University of Maryland Extension: Planting a tree or shrub
- University of Minnesota Extension: Growing asparagus
- University of Minnesota Extension: How and when to divide perennials
- University of Maryland Extension: Vegetable succession and companion planting
- University of Minnesota Extension: Cutworms