Use January to turn last season’s observations into a planting plan and inspect the garden for winter damage. In much of the northern United States, outdoor work is limited by frozen ground; in mild coastal and southern areas, vegetables may still be growing. These tasks follow Northern Hemisphere seasons. USDA hardiness zones describe winter temperature extremes, not planting dates: use local soil conditions and forecasts for each decision.
January tasks
Review and reflect on last year
Walk the garden with a notebook and record what worked and what didn't. Use the questions from the Seasonal Garden Planner to focus your reflection:
- Which cultivars gave good yields and flavor? Which ones disappointed?
- What pests showed up and when?
- Where did disease pressure hit?
- Which beds held moisture well? Which dried out?
- Were there surprises with timing — crops that matured faster or slower than expected?
Go deeper than a one-line verdict. For each major crop, note the specific failure mode rather than a vague "didn't do well" — bolted, cracked, poor fruit set, foliage disease, insect damage, or simply out-competed by weeds. "Tomato X had blossom-end rot on the first flush, then recovered once I mulched" is a decision you can act on next July. "Tomatoes were okay" is not.
If you photographed the garden through the season (even just phone snapshots), scroll back through them now. Photos catch things memory drops — the week a bed was completely shaded by a neighbor's tree leafing out, or how crowded a planting actually was at its peak. Cross-reference the dates against your notes.
These notes become your decision-making record for this year. Keep them somewhere you'll actually reopen in June — a paper garden journal, a spreadsheet, or notes in your phone. The specific format matters less than the habit of writing while memory is still accurate rather than reconstructing it from nothing next January.
Order seed early
Inventory existing packets before ordering. Record the crop, variety, packet year, and amount left; test doubtful seed before buying replacements. Compare varieties against the problems recorded last season:
- First choice goes to seeds you know performed well
- Try one or two new varieties per season rather than overhauling everything
- Check days to maturity against your season length (check your local freeze dates if you haven't already)
- Read the disease resistance codes on tomato and pepper varieties and match them to pressure you saw last year
Calculate quantities from the space available and the number of sowings planned. Seed longevity varies by species and storage; do not assume every half-used packet will remain reliable next year.
Reading disease resistance codes. Use the supplier’s key: abbreviations, pathogen names, and race numbers vary. Resistance to one Fusarium race does not imply resistance to every race, and resistance does not mean immunity. Match the code to a confirmed local problem; leaf spots, wilt, and nutrient stress can look similar, so ask Extension for identification before replacing an entire variety list.
Testing old seed for viability. Put 10–20 seeds on a damp paper towel in a closed container. Label with the variety and start date, and keep at the temperature the packet recommends. Check daily, keeping the towel damp, and allow the full stated germination window before counting normal sprouts. Eight sprouts from ten seeds suggests roughly 80% germination; it is a small sample, not a guarantee of field emergence. For modest losses, sow extra and thin. Replace weak seed for precision sowings or crops where a failed row would cost a planting window. Penn State explains seed germination and viability testing.
Storage while you wait for spring. Keep dry packets in an airtight container in a cool place, with a silica-gel packet to absorb moisture. A refrigerator works well. Let the sealed container warm to room temperature before opening so condensation does not form on cold seed. Keep a separate list of seed that needs moist chilling before sowing; dry storage and cold stratification are different treatments.
Schedule dormant pruning
Late winter, shortly before growth resumes, suits many deciduous trees. January may be too early in a severe-winter climate, and some species need a different season to limit disease. Identify the plant and the purpose of each cut before starting. See Dormant pruning in detail.
Drain and store irrigation
Before freezing weather (if you haven't already), drain irrigation lines, shut off the main valve, and store hoses. Water left in lines can freeze and crack them. Drain soaker hoses by hanging them or laying them on high ground to drain completely.
Inspect and repair structures
Check trellises, beds, fencing, and cold frames for winter damage. Repair or replace weakened wood now, before spring. Inspect raised beds for rot and replace boards if needed.
Dormant pruning in detail
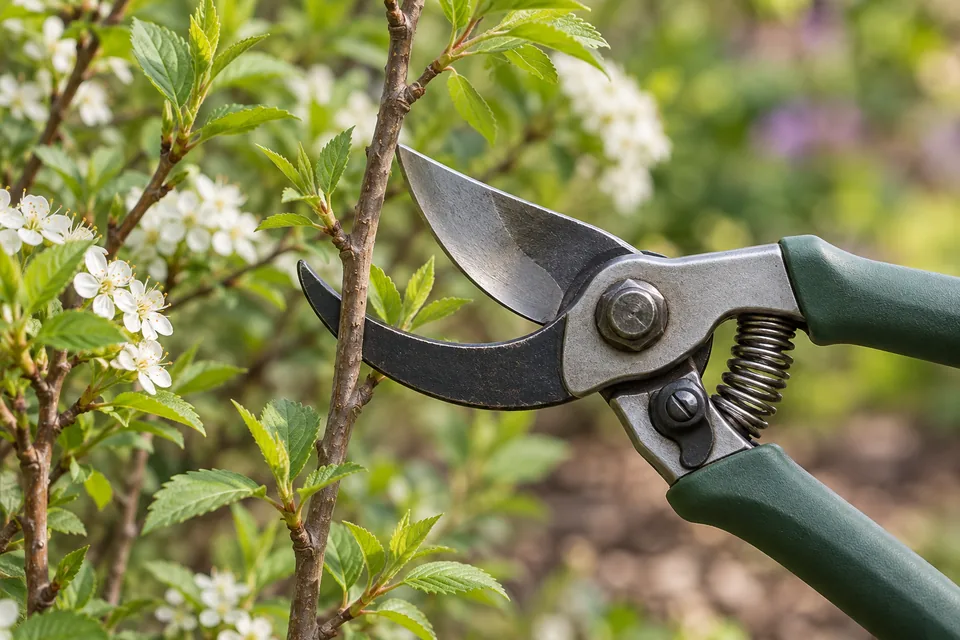
Match the tree and training system. Apples and pears often use a central leader; peaches commonly use an open center. Cherry and plum systems vary with species, rootstock, and region. Retain the intended structure rather than applying one shape to every tree. Start with dead or broken wood, then identify rubbing branches and crowded growth. Keep productive fruiting wood: an apple’s short fruiting spurs are not unwanted stubs.
Timing exceptions matter. In areas with bacterial canker or silver leaf, cherries and plums are often pruned in dry spring or summer weather. Follow a local fruit-tree guide; RHS guidance explains why silver leaf changes pruning timing. Delay major corrective work on a weak, newly planted, or winter-damaged tree until its condition can be assessed.
Two cut types, two purposes. A heading cut shortens a shoot to a bud and encourages branching below the cut. A thinning cut removes a branch at its origin and opens the canopy with less localized regrowth. For a mature landscape tree, preserve the branch collar—the slightly swollen attachment at the trunk—and avoid both flush cuts and long stubs. Support a heavy limb with preliminary cuts before making the final cut at the collar; use an arborist for large or overhead work.
Set a modest removal limit. Prune only what is needed. Age, health, species, and the objective determine how much live growth a tree can lose; one-third is not a universal safe allowance. Renovate neglected fruit trees over several seasons and reassess their response before cutting again. Topping a tree to reduce height creates weak regrowth and large wounds.
For ornamental shrubs: leave the flower-bearing wood of forsythia, lilac, azalea, and other spring bloomers until after flowering. Identify hydrangeas before cutting: panicle and smooth hydrangeas flower on new growth, while bigleaf and oakleaf hydrangeas generally carry flower buds on old wood. Reblooming cultivars complicate that distinction. Remove confirmed dead wood, but do not treat every summer-flowering shrub as suitable for hard pruning. University of Minnesota’s hydrangea guide explains the groups.
Tools and wound care. Use sharp bypass pruners for live stems, loppers for larger reachable branches, and a pruning saw when the branch exceeds the tool’s rated capacity. Clean off sap and debris before storing. Routine wound paint is unnecessary; oak-wilt guidance is an important regional exception when oaks are wounded during high-risk periods. Consult your local oak-wilt calendar before pruning. Trees seal and compartmentalize wounds; they do not replace damaged wood in the way skin heals. See University of Minnesota’s pruning guidance.
When disease is present, use disease-specific instructions. The distance to cut below visible symptoms, timing, and need to disinfect between cuts depend on the disease. Do not carry contaminated debris or dirty tools from a suspect plant to a healthy one. If disinfecting, first remove debris and follow the disinfectant’s contact time; a quick wipe with an unspecified bleach dilution is not a dependable protocol.
What to plant in January
Where winters are mild: use a local winter vegetable calendar to select onions, leafy greens, peas, roots, and brassica transplants. Check the forecast as well as soil temperature; occasional freezes still occur in otherwise mild regions, and seedlings are less resilient than established plants.
Where the ground freezes: concentrate on stored crops, structures, and planning. An unheated frame cannot make January sowing dependable during prolonged freezing weather. Existing spinach or other hardy greens established in autumn may survive under cover and provide occasional harvests.
Where a thaw opens a planting window: wait until the soil is drained and crumbly. Peas, spinach, lettuce, and radish can germinate in soil around 40–50°F, but slowly; other crops have different requirements. Sow a small trial row if conditions are marginal and retain seed for a later sowing. Cover is useful only when you can monitor the temperature and ventilate it.
Cool-season crops suitable for January planting
- Leafy greens: lettuce, spinach, arugula, mustard, kale (as transplants)
- Brassicas: broccoli, cabbage, cauliflower (as transplants)
- Alliums: onion sets or transplants
- Root crops: carrots, beets, parsnips, radishes
- Legumes: peas (sugar snap, snow, shelling), fava beans
- Others: chard, endive, radicchio
Key timing: short days, low light, and cold soil slow winter growth together. Harvest dates on seed packets assume more favorable conditions; a January sowing may take much longer. For reliable winter harvests, the main work is usually establishing plants in late summer or autumn, then protecting them. Record sowing and harvest dates this winter so next year’s planting window is based on your garden.
Season extension structures for January growing
If you're gardening in a moderate or cold climate and want January harvests, the structure you choose determines what's possible:
- Cold frames: A bottomless box with a clear lid (glass or rigid plastic) set directly over a bed. Cheap to build from scrap lumber and an old window. Protection varies with the frame, wind, soil warmth, and duration of cold. Put a minimum–maximum thermometer inside at plant height and vent according to the internal temperature; sunshine can overheat a closed frame even on a cold day.
- Low tunnels: Wire or PVC hoops covered with row cover fabric or plastic sheeting over a bed. Faster to install over a long row than individual cold frames, and easy to remove for harvest access.
- Unheated high tunnels/hoop houses: A walk-in structure over multiple beds. The biggest investment of the three, but the payoff is being able to work standing up and grow a meaningful quantity of greens through winter in many climates.
- Double-covering: Row cover fabric directly on the plants, inside a cold frame or tunnel, adds insulation for established hardy greens, but provides no guaranteed minimum temperature. Support covers where needed and keep foliage away from cold plastic.
Bed preparation
Add compost and mulch
Keep bare soil covered with clean shredded leaves or another suitable mulch. Add finished compost only where soil organic matter and nutrient levels justify it; established beds do not automatically need several inches each winter. Repeated heavy applications, especially manure-based compost, can build up phosphorus and salts. University of Minnesota describes the problems caused by excess compost.
Leave unfinished compost in the pile to mature. Do not spread compost, fertilizer, or manure onto frozen or saturated ground where runoff can carry it away. Pull mulch away from plant crowns and trunks, and keep it clear of the small area where seeds will be sown.
Prepare beds for spring under protection
If using a cold frame or low tunnel for January planting, prepare beds thoroughly:
- Use the soil test and the crop’s requirements to decide whether any nutrients are needed
- Ensure good drainage so water doesn't pool in the bed
- Set up the cover or frame before planting
Check and repair raised beds
Inspect corners, fasteners, and boards without stepping into wet beds. Replace unsound framing before it fails; protect nearby dormant plants while working. Settled soil may need topping up, but established raised beds do not need to be emptied on a calendar. Investigate poor growth with a soil test and drainage check before replacing soil.
Consider a soil test now
Order the laboratory’s kit or instructions now, then sample when the ground is accessible. Combine several equal-depth samples from an area managed the same way; sample vegetable beds, lawn, and an acid-loving shrub bed separately. Avoid fertilizer bands and compost piles. Follow the lab’s depth, drying, and packaging instructions, and state the intended crop so recommendations are relevant.
A soil test guides pH correction and nutrients; it does not diagnose compaction or drainage. Measure bed area before buying amendments: a recommendation per 1,000 square feet must be scaled down for a small raised bed. Lime and sulfur work gradually, so apply only the calculated amount and allow time before retesting. University of Minnesota’s soil-testing guide explains how results inform fertilizer and compost use.
Season planning
Set your local anchors
If you haven't already, look up and write down:
- Your 50% and 10% spring frost dates (from your local National Weather Service forecast office or NOAA)
- Your typical first-fall-freeze date
- Your USDA hardiness zone
- Your typical frost-free growing season length (days between last spring frost and first fall frost)
Sketch your garden layout for spring
Using your notes on what worked and what didn't:
- Decide what you'll grow
- Sketch where each crop will go (this is crop rotation at work — don't plant the same family in the same bed year after year)
- Account for shade changes — where does shade reach each bed as spring and summer progress?
- Note where water pools during heavy rain and plan drainage or water-loving crops there
Calculate transplant start dates
Work backward from your target transplant date (once frost risk is acceptable and the soil and nights are warm enough for that crop). Most warm-season crops need 4–8 weeks indoors before transplanting:
- Tomatoes: commonly 6–8 weeks; peppers and eggplant often need longer—check the variety instructions
- Basil, marigolds, zinnias: 4–6 weeks
- Squash, cucumbers, melons: 3–4 weeks (start late to avoid root-bound transplants)
Write down each crop’s sowing window separately. Do not start squash alongside slow-growing peppers just because both are summer crops.
Review irrigation and watering plans
Look at where you had moisture problems last year:
- Did any beds dry out completely during drought?
- Did others stay waterlogged after heavy rain?
- Do you need to add soaker hoses, drip lines, or mulch?
January is a good time to install new drip irrigation or rebuild systems before the busy spring planting season.
Budget and prioritize infrastructure
Before spring spending starts in earnest, decide what actually needs money this year versus what can wait:
- Repairs first: structural failures (a collapsing bed, a leaking main line) take priority over upgrades
- Targeted improvements: use soil-test results and last season’s failures to choose amendments or irrigation repairs
- Nice-to-haves last: decorative elements, expansion into new beds, and specialty equipment can wait a season if the budget is tight
Rank the list, estimate costs, and schedule each job before the bed is needed.
Winter inspections and seed planning
Make one inspection after each major weather change
A freeze, thaw, heavy snowfall, or windstorm can change priorities more than the date. Walk paths first and avoid trampling frozen foliage or saturated beds. Photograph the same trouble spots after each event so you can distinguish recurring drainage problems from one unusual storm.
- Standing water: note where it collects and how long it remains after rain stops. Clear blocked surface drains and keep downspouts from emptying into beds. Compost will not correct a blocked drainage outlet; plan drainage changes before planting permanent crops.
- Heaved plants: freeze–thaw cycles can lift shallow crowns and expose roots. Once soil thaws and is workable, gently reseat a loose plant at its original depth and replace displaced mulch. Do not stamp it into frozen ground or bury the crown under a mound of mulch.
- Tree guards and ties: check for rubbing, constriction, and hidden rodent damage at the base. Snow can raise the height at which rabbits reach bark. Adjust protection to remain effective while leaving room for the trunk to expand.
- Frames and tunnels: check anchors, hinges, tears, and accumulated snow against the structure’s load limits. Keep access to vents clear. Replace a failed cover before the next cold event, rather than counting on a temporary repair through another storm.
For ice-coated branches, allow the ice to melt rather than striking branches to remove it. Stay clear of hanging or split limbs and arrange professional assessment where a damaged tree threatens a path or building.
Check stored bulbs, tubers, and produce separately
Open storage boxes periodically and examine a sample from the middle as well as the top. Remove soft, leaking, or moldy items promptly; check neighboring material and correct excess moisture or poor ventilation. Label the cultivar and storage date so losses reveal a pattern. Edible potatoes, onions, and ornamental bulbs have different temperature and humidity needs, so do not assume one storage method suits everything.
For dormant ornamental tubers, distinguish minor surface shriveling from progressive collapse or rot before changing moisture. Keep stored planting material separate from produce for eating, and keep all containers identifiable. If a batch repeatedly fails, record the actual storage temperature and obtain a crop-specific storage recommendation before the next harvest.
Plan seed quantities from the final plant count
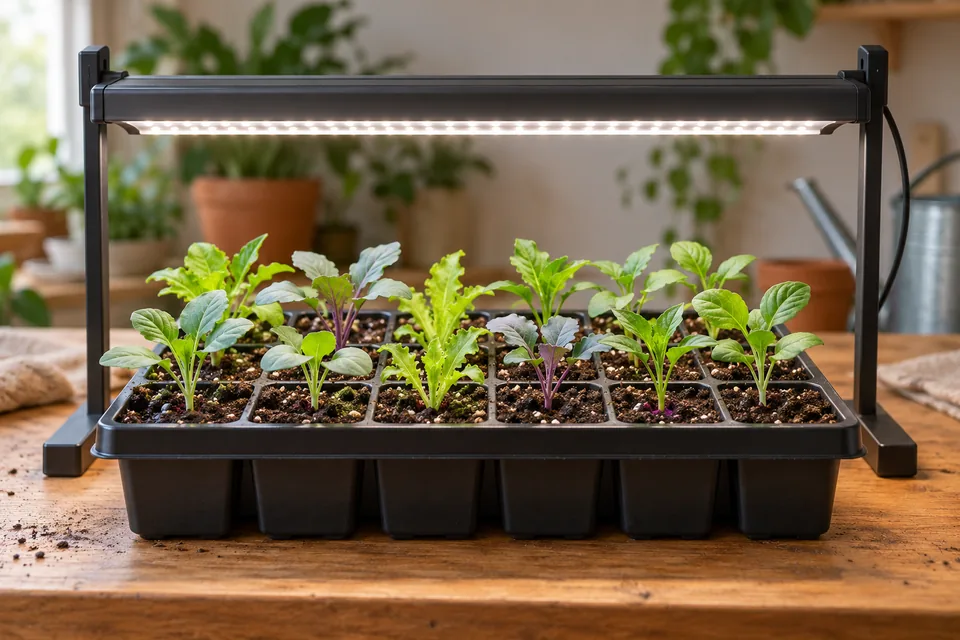
Work backward from the bed, not the packet. For example, a plan requiring six tomato plants might allow eight seedlings as replacements; it does not require a tray of fifty. Divide the desired seedling count by the tested germination fraction, then round up and allow a small handling margin. Eight seedlings at 80% germination require at least ten seeds under comparable conditions. That calculation does not compensate for poor light or a tray that dries out.
Reserve growing space for the larger pots those seedlings will occupy before transplanting. Sketch the light shelf at final pot size and identify which sowings overlap. If the shelf cannot hold them, reduce varieties, stagger starts, or buy a few transplants later. Make labels now with crop, cultivar, and sowing date; mixed-up varieties are difficult to recover once seedlings look alike.
Check cold-treatment requirements for perennial seed
Some native perennials need a period of moist cold before germination. Check the species instructions now: a requirement for weeks of chilling cannot be recovered by putting dry packets outdoors for a weekend. Winter sowing in labeled, draining containers is one option where natural winter conditions provide the required treatment. Protect containers from animals, check moisture during dry spells, and monitor ventilation as spring approaches. University of Maryland’s native-seed guide explains why species differ and why emergence may be uneven. Keep this separate from the schedule for frost-tender vegetables.
Indoor plant care
Indoor plants need adjustments when winter light falls. Compare new growth and pot moisture with autumn conditions rather than following a fixed seasonal watering schedule.
Check the root zone before watering. Lift the pot to judge weight and feel the mix below the surface. Water thoroughly when the species needs it, let excess drain, and empty the saucer. A fern and a succulent should not share the same drying threshold. Persistent wetness, a sour smell, or wilting in wet mix warrants a root and drainage check rather than another drink.
Investigate brown tips. Low humidity is one possible cause; dry roots, accumulated fertilizer salts, and damaged roots can produce similar symptoms. Check moisture and feeding history before changing humidity. A humidifier can help humidity-sensitive plants, but keep leaves out of cold drafts and avoid persistent condensation on windows.
Feed according to growth. Reduce or pause fertilizer for plants that have stopped growing in low light. Plants actively growing under lamps may still need feeding at their normal labeled rate. Do not fertilize a struggling, waterlogged plant to force recovery.
Keep plants away from cold glass and heat sources alike. Leaves touching a cold windowpane can suffer chill damage even when the room itself is comfortable; leaves too close to a heating vent dry out unevenly. A few inches of clearance from both solves most of it.
Rotate for even light. Winter sun angles low and plants lean hard toward the brightest window. A quarter-turn every week or two keeps growth even instead of one-sided.
Sources and further reading
- NOAA: US Climate Normals — historical climate and frost information
- National Weather Service: Local forecasts
- University of Minnesota Extension: Pruning trees and shrubs
- University of Minnesota Extension: Pruning hydrangeas
- RHS: Silver leaf and pruning timing
- Penn State Extension: Seed and seedling biology
- University of Minnesota Extension: Soil testing for lawns and gardens
- University of Maryland Extension: Collecting and sowing native plant seed
- University of Minnesota Extension: Winter houseplant tips