December work follows local conditions. Frozen ground calls for protection and planning; a mild winter may support regular harvesting and new sowings. Dormant trees still need adequate root moisture, and stored crops need inspection. This guide follows Northern Hemisphere seasons. Use your forecast, soil conditions, and regional planting calendar to decide which jobs belong on this week's list.
December tasks
Check crops before the next freeze
Inspect autumn-planted greens and roots before a severe cold spell. Harvest what you will need while the bed is accessible; mulch and covers delay freezing but cannot guarantee access through prolonged cold. Keep row markers visible above mulch and snow. For crops under cover, check the forecast against the protection you actually have, including tears, loose edges, and wind exposure.
Monitor dormant plants
Walk through after a thaw or storm. Look for exposed roots, displaced mulch, animal damage, and standing water. Check soil moisture around recent plantings instead of assuming winter rain reached the root ball. Schedule routine pruning by species and local disease guidance; dormancy alone does not make every shrub suitable for cutting.
Check stored vegetables
Remove soft, leaking, or decaying produce promptly and inspect its neighbors. Label containers by crop and harvest date so the oldest sound produce is used first. Check a sample from the bottom of the container as well as the top.
Carrots and beets keep best cold and humid, around 32–40°F without freezing, with approximately 95% relative humidity. Perforated bags in a refrigerator can reduce moisture loss without trapping excessive condensation. Onions and garlic need drier storage; winter squash needs a warmer location. Follow Minnesota Extension's crop-specific storage guidance. Measure the actual temperature near stored produce, especially beside garage doors or exterior walls.
Plan spring garden layout
Use this quiet time for design:
- Draw current layout — where each crop is now or was in past years
- Identify problems: Shaded areas, wet spots, overcrowded beds
- Plan changes: New bed locations, trellis placement, pathway improvements
- Map crop families: Move related crops between beds where practical; rotation helps with some soilborne problems but does not replace disease diagnosis
- Account for succession planting: Reserve space for repeated plantings
Order from a measured list
Inventory packets before buying. Note the variety, remaining quantity, packet year, and germination-test result. Compare the order date with your earliest planned sowing and the supplier's dispatch schedule; availability varies, so no single February deadline applies everywhere. Choose a substitute in advance for any variety you cannot obtain.
Map succession plantings
Give each sowing a location and an expected harvest window. A second packet of lettuce is useful only if there is space to grow it when the first crop is still standing.
- Lettuce and radishes: Use small repeat sowings within the local cool-season window. Lengthen or pause the sequence when heat makes quality unreliable.
- Bush beans: Start after frost risk and soil temperature are suitable. Plan the next sowing around the harvest period and household demand.
- Carrots: Allocate enough row length for the quantity you use; one larger storage sowing may suit you better than frequent small sowings.
- Sweet corn: Reserve pollination blocks for each planting, rather than splitting the crop into isolated short rows.
Include removal and replanting time between crops. Two sowings made a week apart can mature together if the second grows in much warmer weather. Record actual harvest dates next season and adjust the interval instead of treating the calendar as fixed.
Calculate amendments needed
Convert a recent soil-test recommendation to the area actually planted. Multiply bed length by width, total the beds receiving the same treatment, and exclude paths. For example, a recommendation of 10 pounds of a specified product per 1,000 square feet requires 5 pounds for 500 square feet. This illustrates the calculation; it is not a suggested application rate.
Check whether the report specifies a product weight or an amount of nutrient. These are not interchangeable, and changing fertilizer concentration changes the product quantity needed. Record the recommended material, calculated quantity, application timing, and cost before ordering. Include earlier applications so the same bed is not treated twice.
Final harvests
In mild climates
Keep harvesting productive kale, collards, chard, and other suitable greens. Take outer leaves without removing the central growing point, and leave enough foliage to support the plant. Short days and cool soil slow replacement growth, even when afternoon air feels warm.
December can also be a planting month. Depending on region, suitable crops include lettuce, spinach, carrots, radishes, peas, and brassica transplants. Use a local calendar rather than a hardiness-zone number alone: zones describe winter minimum temperatures, not a complete vegetable schedule. UF/IFAS's North Florida calendar includes cool-season December vegetables, while warmer Florida regions use different calendars. Select healthy transplants where seed would establish too slowly, and keep frost protection ready.
In cold climates
Established spinach, kale, leeks, and protected roots may remain harvestable beyond November. Many winter harvests draw on growth made in autumn; an unheated cover cannot reliably replace low light or support rapid regrowth in deep winter.
Let frozen foliage thaw naturally before handling it. Check leaves after thawing and discard tissue that remains collapsed, slimy, or decaying. Lift roots with a fork beside the row rather than pulling hard on tops. If soil is already frozen, use stored produce and leave the bed until conditions allow access.
Keep a thermometer at crop height inside a frame or tunnel. Vent during sunny weather when the interior becomes too warm, and secure the cover again before temperatures fall. Check soil under covers after dry spells: a roof excludes rain as well as snow. Water only as needed, early enough for foliage to dry.
Managing dormant plants
Check moisture beneath the mulch
Dormant shoots still depend on living roots. Recent transplants, evergreens, and plants beside rain-sheltering walls deserve particular attention during dry weather. Feel the original root ball and surrounding soil several inches down; one can be dry while the other is wet.
When dry soil is unfrozen and can absorb water, water slowly over the root area. Colorado State recommends winter watering when air and soil are above 40°F and there is no snow cover. Choose a mild part of the day, allow drainage, then disconnect and empty the hose. Do not water frozen or saturated soil. See its fall and winter watering guidance.
Adjust mulch and feeding to the plant
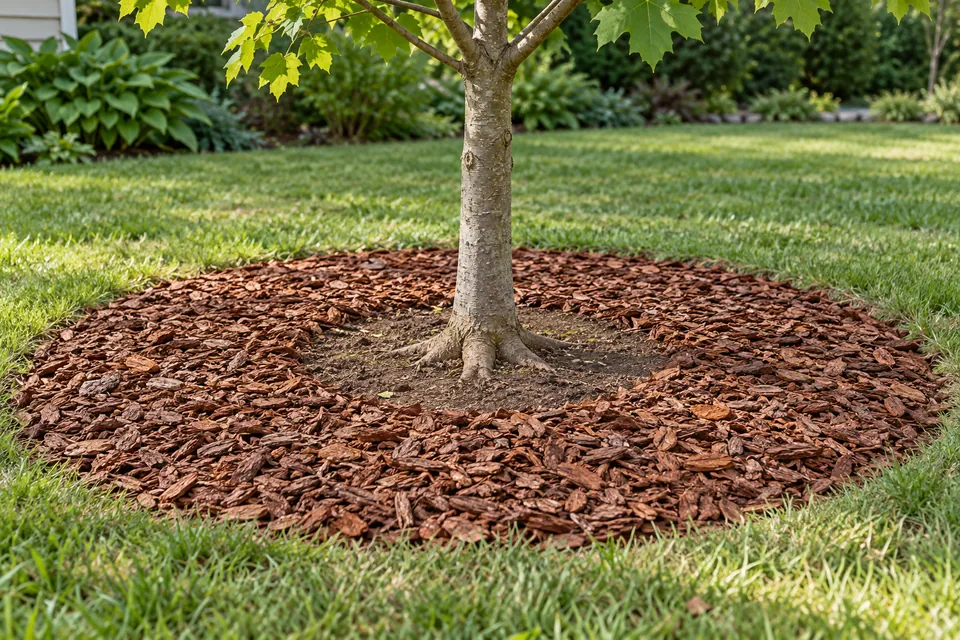
Maintain an even mulch layer around woody plants while leaving the trunk flare and bark exposed. Roughly 2–4 inches of coarse organic mulch is a common range; a deep mound against a trunk is not extra protection. Loose winter coverings over vulnerable perennials serve a different purpose: reducing repeated freezing and thawing. Restore displaced material without burying crowns that need drainage.
Pause routine fertilizer for plants that are dormant or growing very slowly in low light. Actively growing winter vegetables and indoor plants under lights may still need nutrients according to crop requirements, soil tests, and product directions. Do not spread fertilizer on frozen ground or use it to treat unexplained yellowing before checking moisture and roots.
Schedule pruning by species
Late winter suits many deciduous trees, but spring-flowering shrubs already carry next season's flower buds. Save routine shaping of lilacs and forsythias until after flowering. Fruit trees and disease-prone species need their own regional calendar. Remove dangerous damaged limbs with appropriate professional help; do not delay a hazard simply because it is December. Minnesota Extension's pruning guide explains these timing differences.
Garlic and perennial herbs
Check garlic mulch after wind and rain, keeping the layer loose and evenly spread. In cold regions, approximately 3–4 inches of straw or loose leaves is a useful starting point, adjusted for local conditions. Green shoots in mild weather are normal; do not cut them back or add fertilizer merely because they appeared. Inspect heaved cloves when soil is workable and gently restore cover without forcing frozen soil around roots.
Thyme, sage, oregano, and rosemary differ in winter hardiness. Protect container roots from severe freezing and keep moisture from collecting around crowns. Rosemary is not reliably hardy in every temperate garden; follow the cultivar's limits and move tender pots to suitable bright shelter. Take only light harvests from healthy herbs that retain usable foliage, leaving substantial growth until spring.
Winter inspections
Inspect after weather changes
A storm or thaw can change priorities overnight. Keep checks brief and repeat them after significant weather rather than disturbing plants every day.
- Drainage: Photograph puddles and note how long they persist. Clear blocked surface outlets where accessible. Plan drainage repairs before adding permanent plants; extra compost cannot unblock an outlet.
- Animal protection: Look beneath tree guards for chewing, trapped debris, or rubbing. Snow raises the level where rabbits can reach bark, so protection may need adjustment.
- Frames and supports: Check anchors, hinges, loose panels, and snow accumulation against the structure's limits. Keep vents accessible and repair small tears before the next windy period.
- Paths: Avoid walking on frozen foliage or saturated beds. Keep salt-laden shoveled snow away from planting areas where practical.
Leave ice-coated branches to thaw rather than beating off the ice. Keep clear of split or hanging limbs. Mark damaged plants for later assessment; winter browning alone does not establish how much wood is dead.
Protect pots during absences
Before traveling, group plants by light and watering needs, check drainage holes, and move outdoor pots out of avoidable drying wind. Leave a helper clear instructions for checking the mix, with each plant labeled. A fixed instruction to water every pot daily can drown dormant plants. Test any watering device before relying on it, and ensure saucers or decorative containers cannot retain water unnoticed.
Spring planning
Design new beds or improvements
Use winter to plan major changes, and to set your local planting anchors for next year:
- New raised beds: Sketch location, dimensions, materials needed
- Expanded trellising: Where will you grow vertically?
- Improved irrigation: Measure runs, count fittings, and schedule installation before the bed is occupied
- Pathway expansion: Where do you move in the garden?
- Shade structures: For heat-sensitive summer crops?
Build only when access and ground conditions allow it. Carrying materials across wet beds compacts soil; use paths or postpone the job until the site can support the work.
Finalize variety selections
Use harvest records to decide how many plants to repeat. Grow more of crops you used regularly and reduce those that overwhelmed the kitchen. Reserve limited trial space for new varieties; change one variable at a time so results are interpretable.
Create a crop-specific planting calendar
Start with local frost probabilities and planting recommendations, then add the crop's temperature requirements. The average last frost is not a guarantee of frost-free conditions.
- Set a provisional outdoor planting window for each crop, allowing for frost risk, soil warmth, and night temperatures.
- Work backward using the recommended seedling age. Tomatoes commonly need 6–8 weeks indoors; squash and cucumbers usually need only 3–4. Check peppers and other slower crops separately.
- Allow time to harden transplants gradually before planting out. Do not count a week of cold, unsuitable weather as completed acclimation.
- Mark succession sowings and the date each bed must become available for a fall crop.
- Add time beyond packet maturity estimates for slow autumn growth, then compare the plan with your local fall-planting guide.
Write windows in pencil and keep notes on the actual soil temperature and planting date. A workable calendar changes with conditions; starting all summer crops together often creates oversized seedlings before the garden is ready.
Ordering seeds
Choose suppliers by the information they provide
Look for clearly named varieties, packet quantity, current germination or packing information, sowing instructions, and contact details. Regional trials and your own records are stronger evidence of local performance than a label such as heirloom or organic. Compare the delivered cost and number of seeds you will use, not just packet price.
Read the packet before ordering
- Days to maturity: Check whether the count begins at sowing or transplanting; the convention varies by crop and supplier.
- Plant spacing and habit: Distinguish bush from pole beans, compact from sprawling squash, and determinate from indeterminate tomatoes.
- Disease resistance: Read the supplier's code key and match resistance to an identified local problem. Resistance does not mean immunity to every disease.
- Quantity: Convert the planned row length or transplant count into seed requirements, including repeat sowings and a modest reserve.
- Packet year: Use it as a record of age, not an automatic expiry date. Longevity depends on species and storage conditions.
Test stored seed before replacing it
Test questionable packets early enough to order replacements. Take at least 20 randomly selected seeds, spread them on damp paper towel, and keep the labeled towel enclosed so it stays moist. Provide the species' germination conditions and check regularly. Count germinated seeds at the end of the normal germination period; 16 out of 20 is 80%. A small test estimates performance and cannot guarantee field emergence.
Replace poorly germinating seed for crops where an uneven stand would waste valuable space. Store sound dry seed in labeled packets inside a sealed container in a cool location. Iowa State's seed storage and testing guide provides the procedure and species-specific longevity guidance.
Match seed type to your purpose
F1 hybrids come from a controlled cross between selected parent lines. Choose them for specific traits supported by the variety description, such as disease resistance or uniform maturity. Seed saved from an F1 usually produces variable offspring, so it is unsuitable when you need to repeat the same variety reliably.
Open-pollinated varieties can reproduce their characteristics when seed is saved from suitable plants and unwanted cross-pollination is prevented. Heirloom status describes a variety's history; it does not guarantee flavor, yield, or resistance. If saving seed is a priority, check the crop's pollination requirements before selecting varieties to grow together.
Keep most space for reliable crops and give a new variety a defined trial area. Compare it with your usual variety at the same planting date and under similar conditions. Record harvest timing, usable yield, flavor, and disease symptoms so next December's choice rests on evidence.
Caring for holiday plants
Poinsettias
Like other houseplants, poinsettias need light and careful watering. Give them bright daylight and keep them away from cold glass, drafts, and heating vents. Check the potting mix; water when its surface feels dry or the pot becomes light, before the plant wilts. Remove decorative foil or the outer pot, water thoroughly, and let excess drain before replacing it. Do not leave water standing beneath the pot.
A holiday display does not need routine fertilizer. If keeping the plant afterward, resume appropriate feeding when new growth appears. The colored bracts eventually fade; that alone does not mean the plant is dying. See Minnesota Extension's poinsettia care guide.
Amaryllis
For an ordinary uncoated bulb, use a pot with drainage and leave the upper part of the bulb above the mix. After the initial watering, keep the mix only barely moist until growth appears, then increase watering as the plant uses it. Provide strong light, turn the pot regularly, and support a leaning flower stalk.
After flowering, remove the spent stalk while retaining healthy leaves. Continue light, watering, and feeding during active growth to rebuild the bulb for another season. Wax-coated gift bulbs are different: they flower from stored reserves and require no watering while waxed. Iowa State's amaryllis guide covers both types and the later reblooming schedule.
Paperwhites
Paperwhites do not need chilling before flowering. Set firm bulbs in potting mix or support them above water with pebbles. In a water-grown display, keep roots supplied while leaving the bulb itself unsubmerged. Provide good light and support stems if they lean; check the water level frequently as roots develop.
Treat forced bulbs as a seasonal display in cold climates. Outdoor survival is possible only where the particular paperwhite is hardy, commonly around zone 8 and warmer; reblooming indoors is unreliable. Illinois Extension's paperwhite guide explains forcing and aftercare limits.
Living Christmas trees
Choose a species suited to the planting site and its mature size before buying. Arrange the outdoor planting location while ground is workable. Keep the tree outdoors until shortly before display, limit its stay in the heated room, and check root-ball moisture daily. Illinois Extension recommends only four to five days indoors to avoid breaking dormancy. Keep it away from heat sources and drain collected water.
Follow the nursery's transition instructions when returning the tree outdoors. Plant at the correct root-flare depth when conditions allow, water it in, and continue moisture checks through winter. A living tree needs a long-term care plan after the decorations come off. See Illinois Extension's living-tree guidance.
Year-end review
Record variety names, sowing and transplant dates, first and last harvests, usable yield, and quality. Include weather disruptions and the dates pests or diseases first appeared. Photographs of the same bed through the season can reveal crowding or shade that is easy to forget in winter.
Turn each observation into one specific change. Replace "improve watering" with "repair the leaking connector on bed three before transplanting." For a failed crop, separate evidence from assumptions: note symptoms, root conditions, and any confirmed diagnosis before buying a resistant replacement or changing fertilizer. Keep a few successful routines unchanged so next year's comparisons remain useful.
Looking forward to spring
Finish December with a short list that can be acted on:
- A bed map showing crop families, trellises, paths, and spaces reserved for later sowings
- A seed inventory separating reliable packets, test results, and replacements to order
- Planting windows tied to local conditions and each crop's seedling age
- A repair list with dimensions, quantities, and the date each item is needed
- A reminder to check stored produce, protected crops, and dry root balls after the next weather change
Start seeds when their schedule requires it, which may be well after February in a cold region or much earlier in a mild one. Use the January tasks guide to carry forward winter inspections and seed preparation.
Sources and further reading
- Colorado State University Extension: Fall and winter watering of plants and trees
- University of Minnesota Extension: Harvesting and storing home garden vegetables
- UF/IFAS Extension: North Florida gardening calendar
- University of Minnesota Extension: Pruning trees and shrubs
- Iowa State University Extension: How to store seeds and test germination rates
- University of Minnesota Extension: Growing and caring for poinsettia
- Iowa State University Extension: All about amaryllis
- University of Illinois Extension: Paperwhites: Delicate holiday blooms you can grow indoors
- University of Illinois Extension: How to care for a living Christmas tree