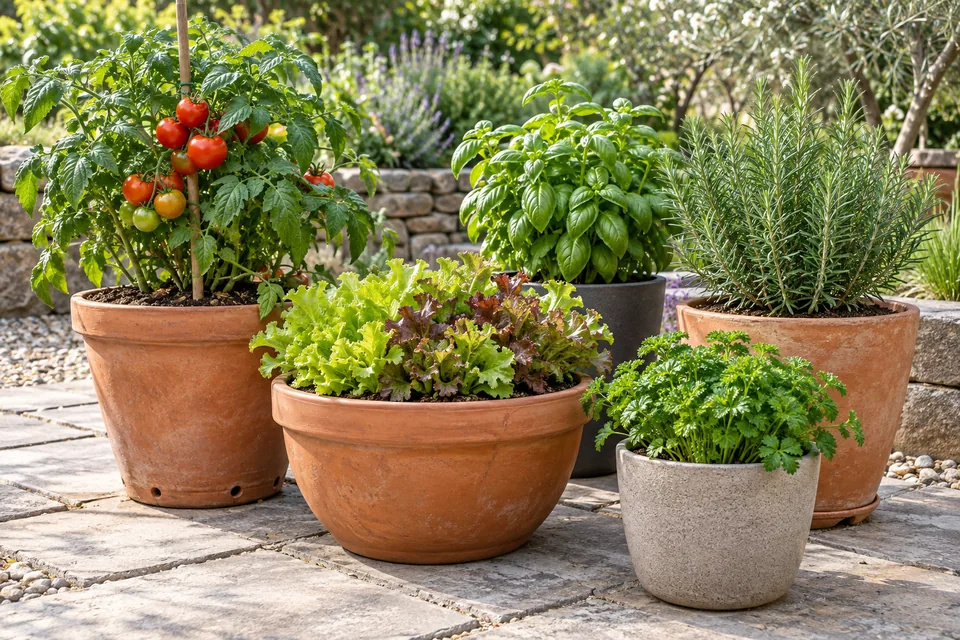
June can be the start of outdoor planting in a cool climate or the first heavy harvest in a warm one. Match each job to the plant's stage: newly planted roots need establishment care, flowering crops need steady moisture, and loaded branches need support. Neither fruiting nor fall planting starts on the same date everywhere.
Make a short circuit of the garden before adding water, fertilizer, or sprays. Check soil moisture, inspect new growth and leaf undersides, and look for loose supports. Repeated observation helps distinguish a developing problem from a temporary response to weather.
June tasks
Water according to root-zone conditions
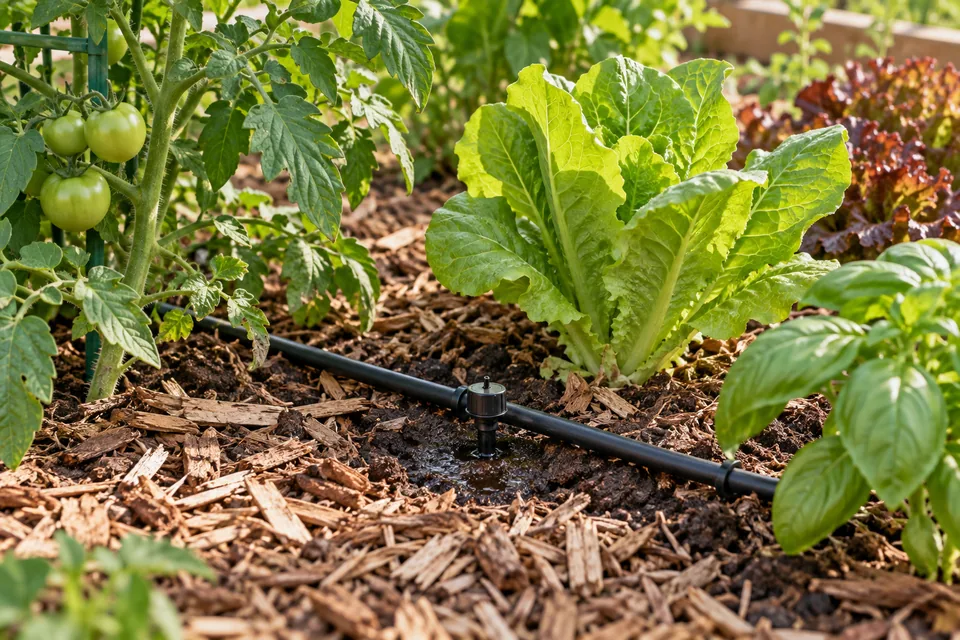
Check established vegetable beds several inches below the surface and inspect newly planted root balls separately. A dry top layer does not necessarily mean the whole bed is dry. Conversely, brief rain may wet the leaves and mulch without reaching the roots.
- Apply water slowly. Pause if it puddles or runs off, then continue once it has soaked in.
- Check the wetted depth. Dig a small inspection hole beside the irrigated area; adjust duration if moisture remains near the surface.
- Keep roots evenly moist, not saturated. Soil that remains wet and airless needs drainage and irrigation correction.
- Measure rainfall. Reduce or skip irrigation when rain has replenished the root zone.
- Revisit new transplants and pots frequently. Their limited roots can dry out while the rest of the garden is adequately moist.
Drip lines, soaker hoses, and careful hand watering can all work. Choose a method you can maintain, then check its delivery. Run irrigation while inspecting for blocked emitters, dry ends of beds, and leaks hidden by foliage. Keep organic mulch roughly 2–3 inches deep around established plants without piling it against stems; more is not automatically better.
Flowering, fruit filling, root enlargement, and head formation are especially important stages for dependable moisture. If water is limited, use crop stage as well as plant value to set priorities. UMN's irrigation guide lists the critical periods by vegetable crop.
Prune and feed for the crop, not the month
June is not a universal stopping point for pruning or fertilizer. Spring-flowering shrubs may be due for pruning after bloom, supported indeterminate tomatoes may need training, and actively growing vegetables may need a measured side-dressing. Postpone unnecessary pruning during severe heat or drought stress.
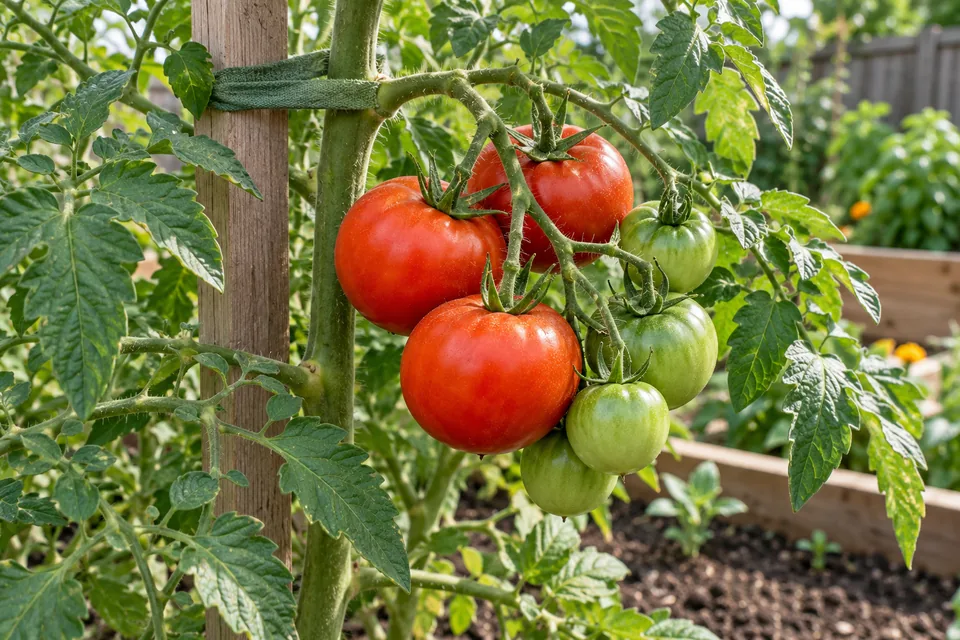
For tomatoes, identify the growth habit before removing shoots. Indeterminate plants can be trained to a chosen support system; extensive sucker removal from determinate plants can remove part of their limited crop. Retain enough foliage to shade fruit. Remove damaged or diseased material selectively, and avoid making large cuts simply to make the plant look tidy. University of Maryland's tomato guide covers training and crop care.
Check the existing fertilizer plan before adding more. Account for preplant fertilizer, compost, and controlled-release products already used. Use crop-specific recommendations and the product label to set the rate, and do not fertilize a wilted plant as a substitute for diagnosing its roots and water supply. Containers often need supplemental nutrients during their long harvest period even when an amended garden bed does not.
Harvest and scout on the same visit
Carry a clean harvest container and a separate container for damaged fruit. Check beneath squash leaves and along bean vines for produce that is easy to miss. Remove overmature cucumbers and summer squash so they do not consume resources while you are waiting for tender new fruit.
As you harvest, inspect leaf undersides for mites, aphids, and whiteflies. Fine stippling, webbing, or sticky deposits are clues, not a complete diagnosis. Look for living pests before treating. If damage is expanding, photograph it, identify the cause, and use a control suited to that pest and crop. Record any pesticide's preharvest interval so fruit is not picked too soon after treatment.
Keep planting where the season allows
In short-season areas, finish planting warm-season crops once frost risk and soil temperature permit. In longer seasons, small additional sowings of beans or cucumbers may extend harvest. Check that the variety has time to mature before autumn conditions limit growth. Do not sow another long-season crop merely because a bed has become empty.
Mark each sowing with crop, variety, and date. If an earlier sowing failed, investigate crusted soil, rotted seed, pests, or unsuitable temperature before repeating it. Replanting into the same unresolved problem wastes both seed and the remaining season.
Managing summer heat
Diagnose wilt before increasing irrigation
Broad leaves can droop briefly when water loss exceeds root uptake on a hot afternoon, even in moist soil. Check moisture and revisit the plant when temperatures fall. Recovery is useful evidence, but it does not by itself exclude disease.
Use this sequence:
- Feel the root zone. If it is dry, water thoroughly and assess recovery. If it is wet, do not add another automatic soaking.
- Compare nearby plants. A whole exposed row wilting during peak heat suggests a different problem from one collapsing plant beside healthy neighbors.
- Inspect the stem and crown. Look for a broken stem, constricting tie, chewing damage, or frass near a squash stem that could indicate a borer.
- Check drainage and roots where possible. Saturated soil can deprive roots of oxygen and contribute to rot.
- Seek a diagnosis for persistent symptoms. Wilt continuing overnight, one-sided yellowing, or rapidly spreading collapse warrants closer investigation.
Do not use a rigid “recovers within two hours” test to diagnose disease. Damage severity, weather, root condition, and the actual volume watered all affect recovery. Repeatedly watering a wet, wilting plant can make matters worse.
Prepare for a heat spell
Water when the soil needs it before plants enter the hottest part of the day. Secure suitable shade cloth above heat-sensitive plants with open sides for airflow. Start with moderate shade rather than a dense cover that sharply reduces light; fruiting crops still need enough light to produce. A fabric frost cover can trap heat and is not a substitute for shade cloth.
Protect existing fruit by retaining healthy leaves. Removing a canopy during a heat wave can expose tomatoes and peppers to sunscald. Delay transplanting, division, or other root disturbance when a cooler spell is close. If a planting cannot wait, use temporary afternoon shade and monitor the original root ball closely.
A container may require water more than once during extreme heat, but an in-ground bed should not be put on that schedule without soil checks. Soil texture, exposure, and pot size matter more than the calendar. UMN's hot-weather guidance covers watering and postponing pruning during heat waves.
Understand fruit problems before adding remedies
Blossom-end rot appears as a sunken, dark area at the blossom end of tomatoes, peppers, and some other crops. It reflects inadequate calcium reaching developing fruit, which can happen even in soil containing enough calcium. Fluctuating moisture, root injury, and excessive fertilizer can contribute. Remove badly damaged fruit, stabilize watering, avoid deep cultivation near roots, and use a soil test before adding calcium. Epsom salt supplies magnesium, not calcium, and is not a cure. Clemson explains contributing factors and soil-test-based correction.
Cracking often follows rapid water uptake after a dry period. Keep watering consistent and harvest fruit that has started to ripen before heavy rain when cracking is a recurring problem. Split fruit deteriorates quickly; inspect it and use sound fruit promptly rather than storing it with intact fruit.
Blossom drop can occur when heat disrupts pollination and fruit development. Healthy foliage plus flowers that fall without setting fruit is not automatically a fertilizer deficiency. Protect plant health and wait for more favorable conditions; extra nitrogen can produce more leaves without correcting the reproductive problem.
Give containers a separate check
Feel the potting mix below the surface and compare the weight of a manageable pot before and after watering. Apply water slowly until the mix is rewetted and excess drains. If water immediately runs down a gap between shrunken mix and the pot wall, use repeated slow applications to rehydrate the interior rather than assuming drainage proves the job is done.
Keep drainage holes clear and empty standing water from ordinary saucers. Self-watering containers are different: maintain their reservoir and overflow according to their design. Pots under eaves may receive little rain even during a storm. A larger root volume usually gives more margin against drying than repeatedly rescuing an undersized pot. Maryland Extension explains container watering and drainage.
Supporting pollination
Check whether pollen can reach the flowers
Remove pest covers from squash, melons, and ordinary cucumbers when female flowers need insect visits. Look beneath foliage: female flowers have an immature fruit at their base, while male flowers sit on a plain stalk. Some cucumber cultivars can set fruit without pollination; follow their specific growing instructions.
Observe open flowers on a dry morning. If both flower types are present but pollinator visits are scarce, hand-pollinate a few marked flowers of the same crop and compare their fruit development with unassisted flowers. Do not remove all male flowers for the kitchen; they supply pollen. Early male-only flowering is common and does not call for more fertilizer.
Tomatoes have self-fertile flowers. Wind and bee vibration help release pollen, so transferring pollen between separate male and female tomato flowers is not the appropriate method. Sweet corn depends on airborne pollen: block planting and adequate moisture during tasseling and silking help kernel development. Illinois Extension describes pollination differences among vegetable crops.
Keep useful insects in the garden
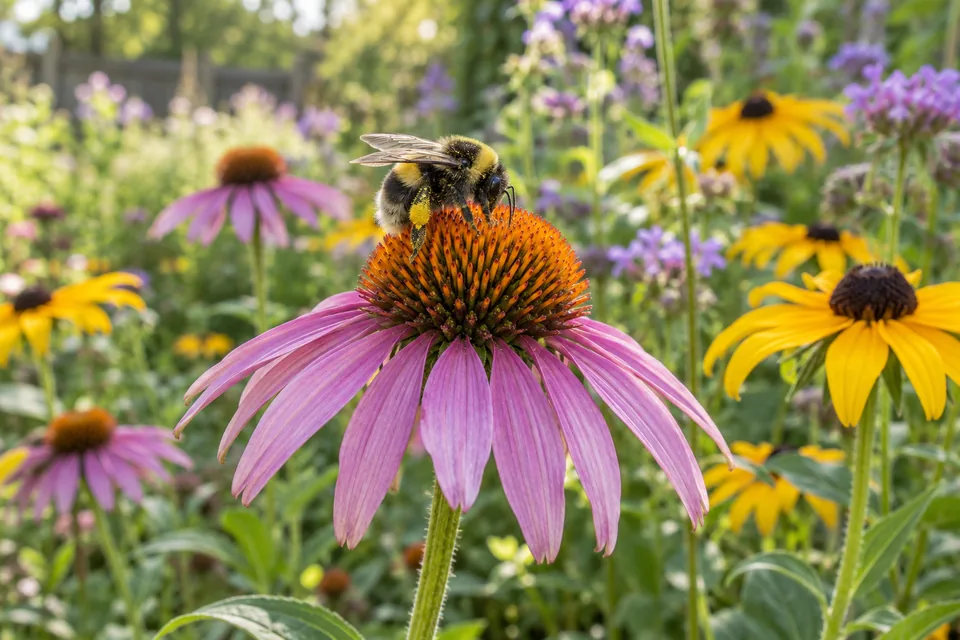
Maintain a sequence of flowering plants rather than relying on one brief flush. Leave selected herbs to flower while harvesting leaves from others. Preserve suitable undisturbed ground and hollow stems where they can provide nesting habitat, without leaving diseased crop debris in production beds.
Avoid unnecessary insecticide applications. If treatment is justified, follow flower, bee, and timing restrictions on the specific label. Spraying after bees stop foraging may reduce direct exposure, but residues can remain hazardous. Do not assume that “organic” means harmless to pollinators.
Caring for berries and fruit trees
Renovate established June-bearing strawberry beds after harvest
Renovation follows the end of harvest, which may occur in June or July depending on location and variety. For an established matted-row planting, remove old foliage above the crowns, narrow overcrowded rows, control weeds, and follow local fertilizer recommendations. Do not cut into the crowns. Keep plants watered as new leaves develop; their postharvest growth supports next year's crop.
Do not apply this mowing treatment to day-neutral or everbearing strawberries that are still producing. Newly planted beds also require a different establishment plan. Identify the type and production system before cutting. UMN's strawberry guidance distinguishes matted-row and day-neutral management.
Thin tree fruit while it is small
A heavy crop can reduce fruit size, strain branches, and reduce flower-bud development for the following year. Remove damaged, crowded, and undersized fruit first. For apples and pears, a common starting point is one fruit per cluster with roughly 6–8 inches between retained fruit. Use species-specific recommendations for peaches and other stone fruits, adjusting the load to tree vigor and branch strength.
Timing matters: thin soon after set, rather than waiting until the fruit is heavy. Preserve the short fruiting spurs when removing fruit. If thinning was missed, reducing an excessive load can still protect branches, but later thinning cannot recover every benefit of early work. Oregon State's fruit-thinning guide explains the species differences.
Keep blueberry roots moist and check pH problems
Blueberries have shallow roots and need consistent moisture during fruit development and subsequent growth. Keep mulch clear of crowns, check underneath it, and avoid disturbing surface roots. Yellow leaves with greener veins can indicate unsuitable soil pH, but poor drainage and other root problems can cause similar decline.
Use a soil test before adding sulfur or fertilizer. Blueberries generally require pH 4.5–5.5; the amendment rate depends on the soil and existing pH, and correction takes time. A general vegetable-bed compost or fertilizer program is not automatically suitable for them. Oregon State explains blueberry soil requirements and chlorosis.
Remove only the bramble canes that have finished
Summer-bearing raspberries produce on second-year canes. Once those canes finish fruiting, remove them near ground level while retaining healthy new canes for next year's crop. Tie retained canes where they will receive light and remain accessible for picking.
Fall-bearing raspberries can be managed for one or two crops; their pruning differs. Blackberry training and summer tipping also depend on growth habit. Identify the variety before cutting green canes, especially when fruiting and nonfruiting canes are intertwined. UMN's raspberry pruning guide explains floricanes and primocanes.
Harvest and care
Pick by maturity cues, not a universal length
- Tomatoes: Pick ripe, or after the first color change when cracking, wildlife, or weather makes indoor ripening useful. Ripen out of direct sun; very immature green fruit may not develop acceptable quality.
- Peppers: Harvest at usable green size or wait for the cultivar's mature color. Cut stems instead of tearing branches.
- Cucumbers: Use the variety's intended size. Pickling and slicing types differ; harvest before large seeds and yellowing develop.
- Summer squash: Pick while skin is tender and seeds are small. Check frequently because fruit enlarges quickly.
- Snap beans: Pick tender pods before seeds bulge. Support the vine as you detach pods.
- Basil and leafy herbs: Cut above healthy leaf pairs, leaving sufficient growth for recovery.
Regular harvest maintains quality and can encourage further flowering in crops picked immature. It does not guarantee that a single missed fruit stops production, nor does it override a determinate variety's natural harvest pattern. Keep harvest tools clean and avoid working through wet bean or tomato foliage when possible.
Handle produce according to the crop
Move harvest into shade promptly and keep it out of a hot car or greenhouse. Use shallow containers for delicate berries and ripe tomatoes so lower layers are not crushed. Separate split, bruised, or damaged produce for immediate inspection and use. Refrigerate perishable produce as appropriate; keep tomatoes being ripened at room temperature. Always refrigerate cut produce promptly.
Record the first harvest date and approximate yield by variety. This distinguishes a variety that performs well locally from one that merely survives, and helps you choose realistic succession dates next year. If the garden is producing more than you can use, reduce the size of the next planting rather than assuming every empty space needs filling.
Planning fall crops
Build the schedule from your local harvest window
Find the local fall planting calendar and likely first-frost period. A hardiness-zone number cannot supply this information. Then record each crop's days to maturity, whether those days run from sowing or transplanting, and whether you want baby leaves or a mature head or root.
Count back from the intended harvest period, allowing extra time for slower autumn growth. If growing your own transplants, also allow nursery time and hardening. Broccoli listed at 65 days from transplanting needs those 65 days in the bed in addition to its seedling stage. Frost-tolerant greens can continue after a light frost, but short days and cold still slow growth.
Reserve space before you need it
List which beds will clear after peas, lettuce, onions, or other early crops. Assign the next crop and an approximate turnover date. Keep a backup space or container for starts if a productive summer planting lasts longer than expected. Avoid delaying fall transplants until they become severely root-bound while waiting for a bed.
Check soil condition before adding amendments. Remove weeds and diseased residues, retain useful mulch, and add only the compost or fertilizer justified by the bed's history and test results. Move the next crop to a different plant family where practical, recognizing that rotation helps some diseases more than others. UMN's midsummer planting guide covers succession choices and bed preparation.
Order seed or arrange transplants now if local fall planting begins in midsummer. In very hot climates the best window may be later; in cool regions long-season fall crops may need an early start. The useful June task is securing the right plants and space before that window closes.
Sources and further reading
- University of Minnesota Extension: Irrigation strategies for vegetables
- University of Minnesota Extension: Gardening in hot weather
- University of Maryland Extension: Growing tomatoes in a home garden
- University of Maryland Extension: Maintaining container-grown vegetables
- Clemson Extension: Tomato diseases and disorders
- Illinois Extension: Flowers and pollination in the vegetable garden
- University of Minnesota Extension: Strawberry production systems
- Oregon State University Extension: Fruit thinning
- Oregon State University Extension: Growing blueberries in your home garden
- University of Minnesota Extension: Pruning and training raspberries
- University of Minnesota Extension: Planting vegetables in midsummer for fall harvest