October tasks depend on how close your garden is to sustained cold. In northern regions, the priority may be storage and winter protection; in mild climates, cool-season planting can continue. Use forecasts, soil conditions, and local planting guidance. A USDA hardiness zone describes winter minimum temperatures, not the date to sow a cover crop or plant garlic. For the whole autumn in one list, ordered by frost and soil temperature rather than by month, see the fall garden checklist.
October tasks
Put weather-sensitive jobs first
Before a forecast frost, pick usable tender crops and move vulnerable containers to shelter. Do not wait for a hard freeze: basil, beans, peppers, eggplant, and tomatoes can be damaged earlier. Check whether a cold night will be followed by useful growing weather. Covering a productive pepper plant for one night may preserve another harvest; repeated freezing weather usually makes harvesting and clearing the better choice.
Lay out fabric, hoops, and anchors in daylight. Keep covers large enough to reach the soil, and arrange access so you can harvest or ventilate without dismantling the whole bed. Inspect structures after wind and rain.
Harvest according to crop condition
- Tender fruiting crops: Pick sound fruit before freezing. Only mature green tomatoes are good candidates for indoor ripening.
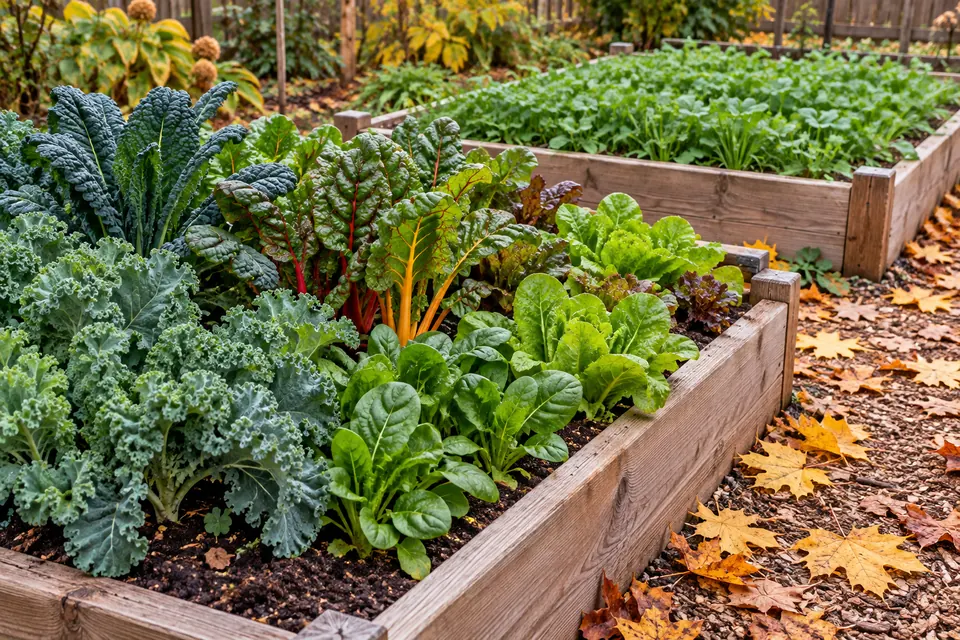
- Hardy greens: Continue picking usable leaves, leaving the growing point intact. Expect slower replacement growth as light declines.
- Root crops: Harvest for storage before the ground becomes inaccessible, or mulch a manageable area for later digging where drainage and winter conditions permit.
- Winter squash: Move mature fruit under cover before frost damages the rind. Use damaged but sound fruit promptly instead of storing it for months.
Set aside enough time to sort the harvest. A clean, labeled crate of sound produce stores better than an unsorted pile brought indoors at the last moment.
Plant only while establishment is realistic
Garlic needs time to develop roots before the soil freezes. Cover crops need enough growth to protect the soil. These are different requirements: a suitable garlic planting day may already be too late for oats or clover. Check each crop against local guidance instead of using one October deadline for everything.
If soil is saturated, wait. Digging or planting into wet soil damages structure and can leave cloves and bulbs sitting in poorly drained pockets. When a cover-crop window has closed, protect the bed with mulch.
Prepare equipment before freezing weather
Disconnect, drain, and store hoses. Empty irrigation filters, timers, and fittings according to their instructions. Some buried irrigation systems need a professional blowout; opening an end cap is not a reliable way to winterize every design. Keep a way to water newly planted trees and shrubs during dry, unfrozen weather.
Brush soil off tools, wash where necessary, dry metal, and sharpen cutting edges. Disinfect pruning tools used on diseased plants with a product appropriate for the tool and pathogen, following its contact time. Clean first: soil and sap interfere with disinfection. Follow the manufacturer’s storage instructions for powered equipment and batteries.
Move tender plants before damage occurs
Tropical container plants and tender herbs need indoor conditions appropriate to the species. Mulch protects roots from temperature swings; it does not turn a tropical plant into a hardy perennial. Inspect foliage, leaf undersides, and drainage holes before bringing plants indoors. Keep new arrivals apart from established houseplants while checking for pests; the houseplant move-in guide covers timing, light, and watering.
For woody plants, avoid heavy late-season shaping while growth remains active. Dormant pruning can be appropriate for some species later in winter; flowering time and disease risk determine the schedule. Retain healthy perennial stems and seedheads where they provide habitat and do not interfere with paths or disease management.
Frost protection strategies
Fit covers to retain ground heat
A cover works by reducing heat loss from the soil and plant canopy; how to protect plants from frost explains which nights and crops it can save. Set it before sunset, support heavy material above delicate foliage, and secure every edge at ground level. Wrapping only the top of a plant leaves the main heat source outside the enclosure.
Use the manufacturer’s fabric specifications rather than assuming all row covers provide the same protection. Light insect fabric and heavier frost fabric differ in light transmission and warmth. Cover performance also depends on soil heat, wind, moisture, installation, and how long temperatures remain low. No blanket gives a fixed, guaranteed temperature gain.
Place a minimum thermometer under the cover at crop height. Compare it with an uncovered bed after the first cold night; the result helps you judge whether the setup is worth using again. Inspect leaves that touch the material, since contact points can suffer damage. Minnesota’s frost-protection guidance explains the importance of material and application.
Manage covers during the day
Sun can warm a tunnel even when outdoor air feels cold. Vent plastic tunnels and cold frames promptly, and remove temporary blankets when temperatures recover. Keep plastic off leaves. Lightweight breathable fabric may remain over suitable crops, but check moisture, pests, and light levels underneath it.
Before a windy freeze, secure frames and decide which harvest matters most. A long period of cold air moving through the garden is harder to protect against than a brief radiational frost on a still night. Harvesting is the more dependable option for tender crops facing sustained freezing.
Use mulch and water for their proper roles
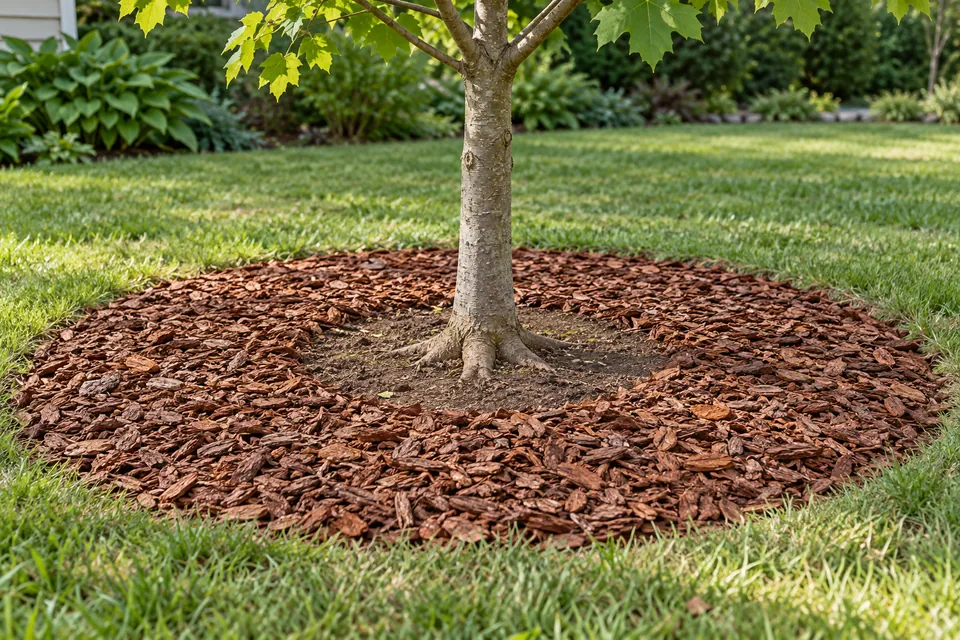
Mulch slows temperature change around roots and can delay freezing of root-crop beds. It does not protect exposed leaves or guarantee access to roots all winter. Keep a clear marker at each row so you can find crops beneath mulch or snow.
If soil is dry, watering the root zone ahead of a frost can improve its heat storage. Do not saturate wet soil or treat watering as a substitute for covering. Sprinkling plants continuously during a freeze is a separate, carefully engineered protection method; intermittent home sprinkling can increase injury.
After frost, let plants thaw before handling them. Remove badly damaged produce from storage batches, but give hardy plants time to show which leaves and growing points survived.
Final harvest
Ripen suitable tomatoes indoors
Choose full-sized, sound tomatoes whose green color is lightening or that already show a blush. Very small, dark-green fruit often fails to ripen satisfactorily. Harvest before freezing; frost-damaged fruit is a poor storage prospect.
Arrange fruit in one layer with room to inspect it, at ordinary room temperature and away from direct sunlight. A sunny windowsill is unnecessary and can overheat fruit. Check every few days and remove anything leaking or decaying. Use fruit as it ripens rather than waiting for the entire batch. Minnesota’s tomato guide describes the mature-green stage.
Preserve herbs in usable portions
Pick clean, healthy stems before cold damages them. Dry herbs that retain flavor well when dried, such as thyme and oregano, in a warm, ventilated place out of direct sun. Freeze tender herbs in recipe-sized portions and label them. If freezing basil in oil or as pesto, keep it frozen until needed; an oil mixture is not a room-temperature storage method.
Harvest parsley and other cold-tolerant herbs as needed while quality holds. Avoid stripping perennial herbs to bare wood just before winter. Keep enough healthy growth to support the plant, and use species-specific winter protection for rosemary and other borderline-hardy herbs.
Lift roots without damaging them
Test a few roots before harvesting the whole bed. Loosen soil beside the row with a fork, then lift rather than wrenching roots from compacted ground. Keep tools far enough away to avoid stabbing produce. Cut leafy tops from storage carrots and beets, leaving a short stub; large tops continue to draw moisture from roots.
Separate split, insect-damaged, and broken roots for prompt use. Store sound roots cold and humid, near 32–40°F without freezing, rather than in a warm basement. Do not put roots into standing water. See the September storage guidance for sorting and separating crops with different requirements.
Make a harvest plan for hardy greens
Pick outer kale and collard leaves while preserving the center. Harvest firm Brussels sprouts from the lower stem as they size up. Do not assume cold hardiness means endless regrowth: short days can leave a plant alive but barely producing.
Choose which rows to harvest fully and which to retain under protection. If you need predictable meals through winter, preserve part of the crop now instead of relying entirely on in-ground survival.
Planting garlic in detail
Choose locally adapted planting stock
Buy healthy seed garlic from a reputable supplier with variety and disease information. Grocery bulbs may be poorly adapted or carry pests and diseases; unknown treatment history is another reason to use planting stock. Reject soft, moldy, badly damaged, or suspiciously discolored cloves. Do not plant cloves from a crop with a suspected bulb disease simply because a few bulbs look normal.
Hardneck garlic generally suits cold winters and produces a scape; softneck types often suit milder conditions and usually store longer. Flavor and storage life vary by cultivar and growing conditions, so neither type is universally superior. Ask a local grower or extension service which cultivars reliably form bulbs in your climate.
Time planting for root growth
Plant in fall while the soil remains workable, allowing several weeks of root development before sustained freezing. That may be September in a cold region or considerably later in a mild one. Warm-winter regions may require adapted varieties and a locally recommended chilling strategy.
Do not translate a hardiness zone directly into a planting date. Soil temperature, elevation, autumn rainfall, and the expected freeze-up all matter. Maryland’s garlic guide is a useful example of a regional calendar; its October timing is not a national rule.
Prepare a bed that drains well
Choose full sun and a bed where water does not collect. Remove perennial weeds before planting, because pulling them through a developed garlic root system is difficult. Base phosphorus, potassium, and lime on a soil test. Compost may help a low-organic-matter soil, but a fertile bed does not need a routine dose of every amendment.
Reserve the bed through the following summer. Garlic usually occupies space beyond the spring planting period; do not schedule early tomatoes for the same ground. Record the variety and number of cloves so you can compare yield and storage performance later.
Plant the cloves
- Separate bulbs shortly before planting. Keep each clove’s papery covering intact.
- Select large, firm cloves for the main crop. Put smaller sound cloves in a separate row for green garlic if space allows.
- Set cloves pointed end up, about 4–6 inches apart. Use the locally recommended depth; about 1–2 inches of soil over the clove is common, with deeper planting recommended in some cold regions.
- Firm and water if the soil is dry. Avoid leaving air pockets or repeatedly soaking a poorly drained bed.
- Label the rows. Include planting date and cultivar.
- Mulch for local winter conditions. Loose straw or shredded leaves help buffer freezing and suppress weeds. Keep the layer from becoming a wet, airless mat.
Check establishment and plan spring care
A few fall shoots are normal; do not cut them back or dig cloves up to investigate. Check after strong wind for exposed soil and displaced mulch. Correct drainage problems if water stands in the bed.
In spring, ease back a matted layer that blocks emerging leaves, while retaining useful weed suppression. Check soil moisture and root health before treating yellow foliage as a fertilizer deficiency. Garlic often needs nitrogen during active spring growth; follow regional recommendations and prior amendments rather than assuming fall compost covers the whole season.
For hardneck garlic, remove scapes while tender once they curl, leaving the leaves intact. Harvest timing is usually late spring to midsummer, depending on climate and variety. Begin checking bulbs when roughly half the leaves have browned but green leaves remain. Dig a sample to assess clove development and intact wrappers. Do not wait for all tops to collapse, as with onions; overmature bulbs can split and store poorly.
Planting spring-flowering bulbs
Plant hardy spring bulbs while soil is cool and workable, allowing time for rooting before it freezes. Where winter provides too little chilling, choose regionally suitable bulbs or follow the supplier’s pre-chilling instructions. Daffodils, tulips, and crocus do not all perform equally in every climate.
Inspect bulbs before planting. Keep firm, sound bulbs and reject soft or rotting ones. Choose a site with good drainage and enough light while spring foliage is active; a spot beneath deciduous trees may receive spring sun but still have substantial root competition.
For many bulbs, a depth around two to three times the bulb’s size is a useful starting point. Follow species and package directions, measuring to the base of the bulb. Larger tulips and daffodils commonly go 6–8 inches deep; small bulbs are shallower. Set the pointed end up, backfill, and water if dry. Iowa State’s planting guide gives depth and spacing examples.
Do not add bone meal or bulb fertilizer automatically. First-year flowers largely draw on reserves already inside the bulb. Fertilizer is useful when the soil or subsequent growth indicates a need; additional phosphorus is unnecessary in a soil already testing sufficient. Keep concentrated fertilizer away from direct bulb contact and follow the product rate.
Mark planting groups and photograph their positions before covering them. This prevents accidental digging when nothing is visible. Leave room for the foliage to remain after flowering next spring: cutting or tying it down early reduces the energy available for later blooms. Choose daffodils where animal browsing is persistent, recognizing that resistance does not guarantee freedom from damage.
Establishing cover crops
Choose the spring removal method first
A cover crop should protect soil without blocking the next food crop. Write down when the bed is needed, how you will kill the cover, and how much time residue will need to break down. A crop that survives winter may regrow after mowing; cutting it once is not always termination.
- Spring oats: Useful where they establish in fall and winterkill, leaving residue that is comparatively easy to manage. Their earlier sowing window may already be closed.
- Cereal rye: Cold hardy and able to establish later than many options, but vigorous spring growth can become difficult to remove by hand. Cereal rye is not annual ryegrass.
- Hairy vetch or clover: Potential nitrogen sources when well established with the appropriate root-nodule bacteria. They need suitable timing, drainage, and a plan to prevent unwanted reseeding.
- Mixed covers: Can combine benefits but complicate termination if their growth stages differ. Start with a small bed if you are new to them.
New Hampshire’s selection guide and Purdue’s home-garden guide explain regional timing and termination. Do not transfer their calendar dates unchanged to another region.
Establish an even stand
Measure the bed and weigh seed at the recommended rate. Remove weeds, prepare the surface, sow at the crop’s specified depth, and firm for seed-to-soil contact. Water if needed for germination; scattering seed onto a dry, cloddy bed is not enough.
Check emergence and bare patches. Legumes can fix nitrogen only when conditions and the associated bacteria allow it; they still need adequate soil fertility and pH. Do not assume a late, sparse legume stand will supply the following vegetable crop’s entire nitrogen requirement.
Avoid a spring bottleneck
Winterkilled residue can remain as surface protection until planting preparation. Winter-hardy crops need deliberate termination before seed set and sufficiently ahead of the following crop. Young rye can regrow after cutting; effective mowing or crimping depends on growth stage and may be too late for an early vegetable sowing.
Incorporated, mature grass residue can temporarily reduce available nitrogen as microbes decompose it. Allow a suitable interval before seeding, and follow local crop guidance. Where you cannot manage a living winter cover, clean mulch is a practical way to protect the bed.
Season-end cleanup
Separate disease cleanup from general tidiness
Remove diseased crop residues, fallen fruit, and weeds carrying seed. Healthy roots and appropriate perennial stems can remain. Keep suspect plant material out of a home compost pile unless its process reliably treats the relevant problem; an occasional hot reading does not prove the whole pile was sanitized.
Record the affected crop and symptoms before clearing. Some soilborne diseases persist for years or have many hosts, so moving a crop to the next small bed may offer limited protection. Identification, resistant cultivars, drainage, and clean planting stock can matter as much as rotation.
Amend only where the soil needs it
Use soil-test recommendations for lime and nutrients. Do not spread a balanced fertilizer on empty beds as a routine closing task. Repeated manure or compost additions can accumulate phosphorus and salts; more organic matter is not always better.
Leave each bed covered with a suitable crop or mulch, keep paths and drainage outlets open, and label any overwintering planting. Record where covers, stakes, and irrigation parts are stored. A usable bed map and intact equipment are the final jobs that make spring planting easier.
Sources and further reading
- University of Maryland Extension: Growing garlic in a home garden
- Iowa State University Extension: Planting spring-blooming bulbs
- University of New Hampshire Extension: Cover cropping for the home garden
- Purdue Extension: Cover crops in the home garden
- University of Minnesota Extension: Growing tomatoes and ripening mature-green fruit
- University of Minnesota Extension: Soil testing for lawns and gardens