July often brings overlapping jobs: harvesting summer vegetables, managing heat, and starting crops that must establish before autumn growth slows. In short-season regions, fall brassicas may already need transplanting; in hot southern gardens, sowing cool-season crops may still be weeks away. Use this temperate Northern Hemisphere guide alongside your local planting calendar and actual soil conditions.
July tasks
Make a short daily harvest round
Carry clean snips, a shallow harvest basket, and a separate container for damaged produce. Check beans, cucumbers, and summer squash frequently once production begins; fruit hidden under leaves can become overmature between weekly visits. Pick eggplants while their skin remains glossy, using the variety's expected size rather than a universal length. Small Asian eggplants and large globe types mature at different sizes.
Pick basil above a pair of healthy leaves so the remaining side shoots can grow. Leave enough foliage to support regrowth. Harvesting immature pods and fruits helps sustain production in many vegetables, but it cannot reverse heat-related flower drop or extend a determinate crop indefinitely.
Give the next crop an actual place to grow
Mark the beds that will become available after peas, garlic, onions, or exhausted greens. Check the next crop's planting window before waiting for the last handful of produce from an old planting. A modest remaining harvest may cost the establishment period needed for a productive fall bed.
Pull weeds before they shed seed. Remove spent tops, supports, and large roots that obstruct sowing, then rake a firm seedbed. Do not automatically add another full fertilizer application: account for earlier feeding, compost additions, and the soil test. A second crop needs available nutrients, not an accumulating surplus of phosphorus.
Check water delivery before increasing the schedule
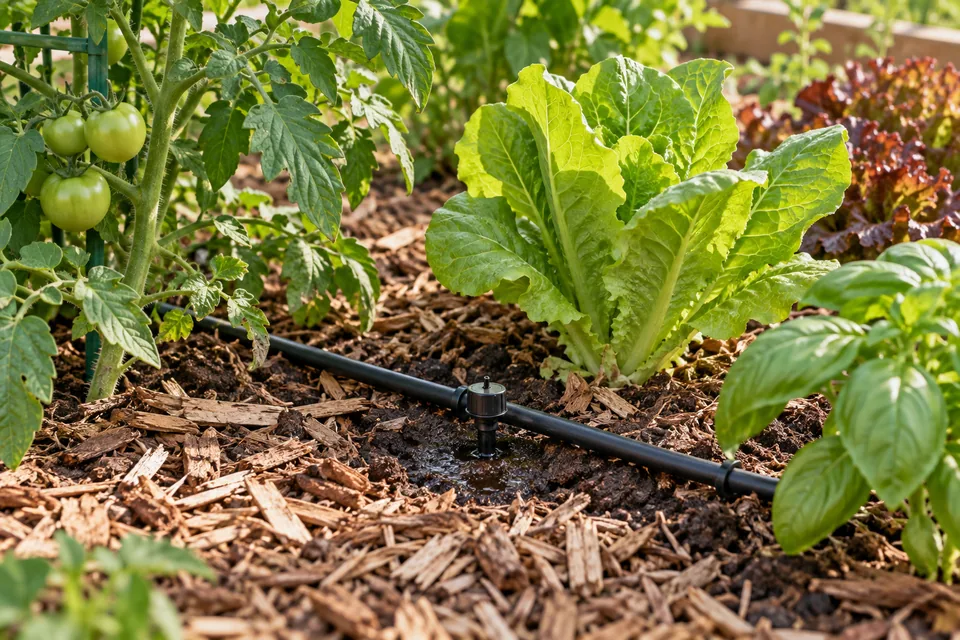
Inspect the soil beneath mulch, at the end of drip lines, and beside plants that wilt first. Look for disconnected fittings, plugged emitters, leaks, and water running into paths. A wet patch beside one emitter does not prove that the full root area received water.
Prioritize germinating seeds, newly transplanted crops, containers, and plants filling edible pods or fruits when water is limited. Established drought-tolerant herbs often need less frequent attention. Use plant stage and rooting conditions to set priorities rather than treating every tomato as more important than every herb.
Scout while harvesting
Look at growing tips, leaf undersides, flowers, and fruit. Record the affected crop, location, and whether damage is spreading. A few old holes with no active pest require a different response from fresh feeding on a small transplant. Photograph unfamiliar symptoms before removing the leaf; an Extension diagnosis is easier with both a whole-plant view and a close-up.
After storms, retie heavy branches with loose, flexible ties and check stakes before the next wind. Keep fruit off wet soil. Remove broken stems cleanly, but retain sound leaves that shade developing tomatoes and peppers from sunscald.
Harvesting at peak
Pick for the intended use
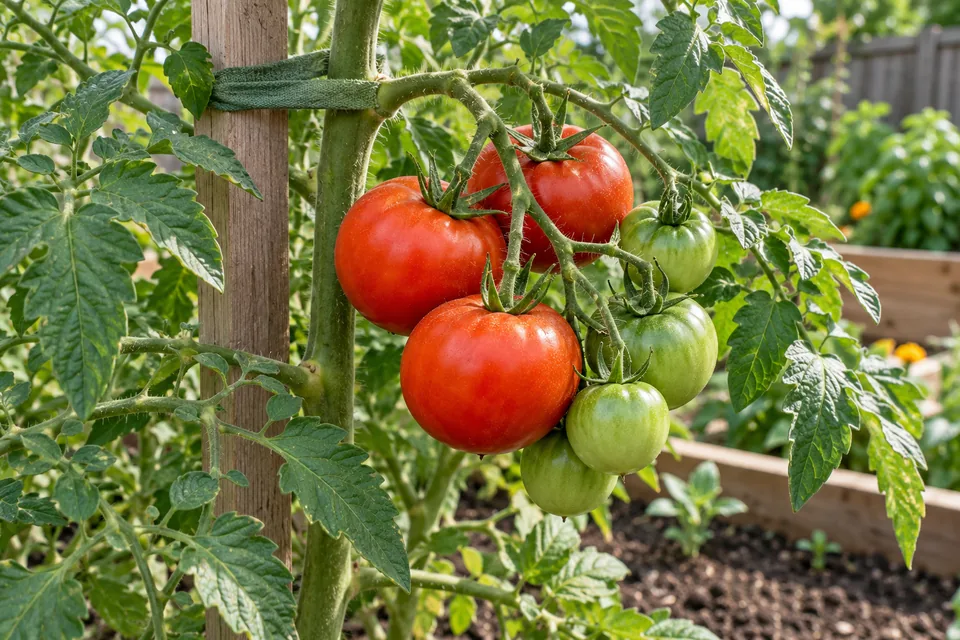
- Tomatoes: Harvest once normal ripening color begins, especially before heavy rain or where animals damage ripe fruit. Finish ripening indoors out of direct sunlight. Green-fruited varieties need their own maturity cues; color alone is insufficient.
- Peppers: Green peppers are edible before full color. Let selected fruit color for sweetness, while picking others green if that suits the kitchen and reduces the load on a small plant.
- Cucumbers: Follow the variety's intended harvest size. Pickling types should be picked smaller than slicers; yellowing, swollen seed cavities, and tough skins indicate declining quality.
- Summer squash: Pick while the rind is tender and seeds are small. Check beneath the canopy. Cut the stem instead of twisting against a brittle vine.
- Snap beans: Pick when pods are full-length but seeds have not become prominent. Dry beans are a different crop: leave those pods to mature and dry.
- Eggplant: Look for glossy skin and tender flesh. A dull, hardened fruit with developed seeds has passed its best eating stage even if its length seems correct.
Maryland Extension's tomato guide explains harvesting at color break and maintaining moisture during fruit development.
Sort before storing
Move harvested produce into shade promptly. Separate sound produce for storage, sound but very ripe produce for immediate use, and anything moldy or rotten for disposal. Do not let one leaking fruit sit against the rest of the basket. Keep harvest containers away from raw manure and animal waste, and rinse produce under running water before preparation.
Cool beans and leafy greens promptly. Keep unripe tomatoes at room temperature; refrigerate fully ripe tomatoes if necessary to prevent spoilage, accepting some quality loss. Storage life depends on ripeness and handling, so inspect stored produce instead of assuming every pepper or herb will last two weeks. Refrigerate cut produce promptly.
Measure whether production is keeping up with demand
For one week, note approximate quantities picked and quantities wasted. If four zucchini plants already exceed household use, replacing one with fall greens may improve the garden's value. Preserve small batches while quality is high, and arrange any surplus collection before produce becomes overripe. Harvest records also give next winter's seed order a better basis than memory.
Fall crop planting
Calculate from a useful harvest window
First frost is a planning reference, not a fixed appointment or the end of every crop. Beans are frost-sensitive; established kale can tolerate conditions that kill beans. USDA hardiness zones describe average annual extreme winter lows and do not supply a reliable first-frost date. Get local fall planting guidance, then check these details:
- Choose the harvest stage. Baby leaves, a full cabbage head, and storage carrots need different amounts of growth.
- Read the maturity clock. Root crop dates usually start at sowing; broccoli and cabbage dates commonly start at transplanting. Check the supplier's definition.
- Allow for slower autumn growth. Add the buffer recommended locally; two to three weeks is a useful planning allowance in many temperate gardens, not a guarantee.
- Include nursery time when starting transplants. Subtract the seedling-growing period before the intended outdoor planting date.
- Check heat and available light. A nominally early sowing can still fail in hot soil, while a late one may survive winter without producing much until spring.
The fall planting calculator does this count from your first frost date.
Worked example: If your chosen harvest target is October 15, a crop listed at 60 days plus a 21-day fall allowance points to sowing or transplanting around July 26. If that 60-day figure starts at transplanting, seed must be started earlier. The calculation estimates a window; it does not predict weather.
University of Minnesota Extension lists crop maturity ranges alongside cold tolerance. Use its principles with dates appropriate to your region.
Match the crop to the time available
Carrots, beets, turnips, and rutabagas usually belong in the direct-sown group because transplanting can damage their developing roots. Choose an early cultivar if the local window is narrowing. Broccoli and cabbage starts can save weeks compared with sowing seed now, but large root-bound plants are a poor shortcut: inspect for healthy roots and pest-free leaves before buying.
For short remaining windows, grow arugula, leaf lettuce, mustard greens, or baby kale rather than expecting a full head or large storage root. Leave room for thinning; dense seedlings do not become a faster crop simply because more seed was sown. If the remaining season is too short, protect the empty bed with mulch or a locally suitable cover crop.
Establish a hot-weather seedbed
Water the bed before sowing so moisture extends below the surface. Sow at the packet's recommended depth, firm gently for seed-to-soil contact, and water with a fine spray that does not wash seed into piles. Keep the seeded layer moist through emergence, checking more often during hot or windy weather. After roots develop, gradually shift to deeper watering rather than maintaining only a wet surface.
Lettuce and spinach can germinate poorly in hot soil. Start lettuce in a cooler, well-lit indoor location or wait for a suitable outdoor window; spinach often does better when directly sown as soil cools. Suspend shade cloth above the bed with airflow beneath it. Avoid laying an opaque board over an unattended sowing, where newly emerged seedlings can quickly be deprived of light. Maryland Extension's fall guide covers these establishment problems and declining autumn light.
Inspect emergence before scheduling another sowing
Label each row with crop, variety, and sowing date. After the packet's expected germination period, inspect gaps: dig carefully for dried seed, rotting seed, or a crusted surface before simply adding more. Thin survivors to their intended spacing while small. A short second sowing a week or two later can spread harvest risk, but keep each sowing inside the local establishment window.
For transplants, moisten both the root ball and surrounding soil. Plant during a cooler part of the day, water in thoroughly, and check the root ball daily until growth resumes. It can dry out while adjacent soil still looks moist. Temporary afternoon shade helps reduce stress; permanent deep shade limits production.
Extreme heat management
Diagnose wilt before reaching for the hose
An afternoon wilt can occur when leaves lose water faster than roots replace it, even in moist soil. Recheck early the next morning. If plants recover overnight and the root zone remains moist, another soaking may create waterlogging. Persistent morning wilt deserves a closer inspection of soil moisture, drainage, roots, stem damage, and disease.
Water dry soil slowly enough to soak into the rooting area rather than run off. Recheck below the surface afterward. Containers and sandy beds may need attention much more often than mulched loam; watering twice daily is sometimes necessary for a small pot, not a default for the entire vegetable garden. Empty standing water from ordinary container saucers and confirm drainage holes are open.
Check how much water the system delivers
Put a measuring container under a representative drip emitter for ten minutes, then repeat at the far end of the line. If one delivers much less, inspect that section before extending the whole system's run time. For example, 300 milliliters collected in ten minutes means that emitter delivers about 1.8 liters per hour under the conditions tested. This measures output; it does not establish how much a particular plant needs.
After a normal irrigation cycle, use a trowel beside several plants to examine the wetted soil. A narrow wet column with dry roots on either side may need better emitter placement, while a saturated layer suggests reducing application or investigating drainage. Note the run time and soil result together. Before leaving the garden unattended, run the timer through a complete cycle and show any helper which young plantings need separate checks. Clear labels are more useful than an instruction to water everything daily.
Reduce heat load without smothering plants
Use temporary, ventilated afternoon shade for vulnerable transplants and greens. Begin with a light shade cloth, monitor growth, and remove unnecessary shade when the heat breaks. Maintain roughly 2–3 inches of loose organic mulch around established vegetables where appropriate, leaving stems and crowns clear; a thick wet mat is not better insulation for a small seedling.
Do not use routine misting as a substitute for root-zone irrigation. Avoid applying fertilizer to a dry, heat-stressed plant in an attempt to force recovery. Resume any needed feeding according to crop guidance once roots have moisture and the plant is growing. University of Minnesota's heat guidance covers shade, moisture checks, and the particular demands of containers.
Flowers without fruit do not always mean poor soil
Tomatoes, beans, and peppers may shed flowers or set poorly during sustained high temperatures; warm nights can be as important as daytime peaks. Extra nitrogen does not restore heat-damaged pollen. Maintain adequate moisture and healthy foliage, then watch for new fruit set as conditions improve. Heat-tolerant cultivars help in recurring hot conditions, but no crop is immune to severe heat or drought.
On squash and cucumbers, inspect the small fruit behind female flowers. Some abort because pollination was incomplete, others because the plant is stressed. Ensure insect covers have been removed from crops that need bee pollination while flowering. Do not assume every shriveled young squash needs fertilizer.
Separate fruit injury from infectious disease
A dark, sunken patch at the blossom end of a tomato or pepper suggests blossom-end rot, often associated with disrupted calcium movement during uneven watering. Bleached or papery patches on the exposed side suggest sunscald. Neither is corrected by a general fungicide spray. Improve moisture consistency and preserve protective foliage; add calcium only when a soil test or diagnosis supports it. See Maryland Extension's tomato problem key for symptom comparisons.
Canning safety basics
Choose the recipe before harvesting a large batch. Use a current USDA, National Center for Home Food Preservation, or Extension-tested process for the exact food and preparation. Ordinary boiling-water processing is suitable for properly prepared high-acid or acidified foods; unpickled low-acid vegetables require a tested pressure-canning process. A sealed lid alone does not establish safety.
Follow the specified ingredient proportions, preparation, jar size, headspace, processing method, and altitude adjustment. Do not thicken a canning recipe, add extra low-acid vegetables, or invent a shorter process. Freeze your preferred sauce if no tested canning recipe matches it. USDA's Complete Guide to Home Canning provides the process tables and equipment instructions.
For plain whole, crushed, or juiced tomatoes, use the acidification required by the tested recipe. Tomato acidity varies with variety, ripeness, and growing conditions; taste cannot establish it. Where USDA tomato directions offer both boiling-water and pressure options, the listed acid addition is still required. Select firm, disease-free fruit and do not can tomatoes from dead or frost-killed vines. Follow NCHFP's tomato introduction.
Read through the full method before filling jars. Confirm that the canner, racks, jars, and lids suit the process, and arrange any required dial-gauge testing through Extension. If the available time or equipment does not fit the method, refrigerate or freeze the produce instead of improvising.
Preserving your July harvest
Freeze in portions you will actually use
Set aside shallow containers, freezer labels, and enough freezer space before starting. Wash and prepare sound produce, pack meal-sized portions, remove excess air where appropriate, and label crop, preparation, and date. Spread packages so they freeze promptly rather than stacking a large warm batch together.
Most vegetables need crop-specific blanching to preserve quality. Time from the point specified in the instructions, cool promptly, and drain before packing. Underblanching and overblanching both reduce quality; use the NCHFP blanching guide and the individual vegetable's directions. Do not apply a bean timing to every vegetable.
Freeze tomato sauces and pesto in small portions; do not treat homemade pesto as a shelf-stable canned product. A flat freezer bag of sauce is easier to thaw in a useful quantity than a large solid container. Keep a simple freezer list and use older packages first.
Ferment with a tested vegetable-specific recipe
Use tested directions for fermented dill pickles or sauerkraut. Their salt quantities, preparation, temperatures, and fermentation periods differ. A generic percentage of salt in water is not a universal safe recipe for every vegetable.
Use suitable food-grade equipment and the recipe's method for keeping vegetables submerged. Follow its inspection and spoilage instructions; discard spoiled batches rather than tasting to decide whether they are safe. Refrigeration after fermentation and canning for shelf storage are separate procedures. Follow the tested storage directions for the product you made.
Dry herbs without trapping moisture
Pick sound herbs after dew dries, rinse, and remove excess moisture. Small bundles of sturdy herbs can air-dry with good circulation. High-moisture herbs such as basil need faster drying to avoid mold, so a dehydrator is often more dependable in humid weather. Leaves should crumble and stems break before airtight storage; label each batch while identification is easy.
Use the temperature and method in NCHFP's herb-drying instructions. For tomatoes and peppers, use their own tested drying directions: an arbitrary oven temperature and a leathery surface do not show that the center is dry enough for storage.
Sources and further reading
- University of Minnesota Extension: Planting vegetables in midsummer for fall harvest
- University of Maryland Extension: Fall vegetable gardening
- University of Maryland Extension: Growing tomatoes in a home garden
- University of Maryland Extension: Key to common problems of tomatoes
- University of Minnesota Extension: Keep gardens thriving through the heat
- USDA/NCHFP: Complete Guide to Home Canning
- NCHFP: Canning tomatoes: introduction and acidification
- NCHFP: Blanching vegetables
- NCHFP: Fermented dill pickles and sauerkraut
- NCHFP: Drying herbs